On this page
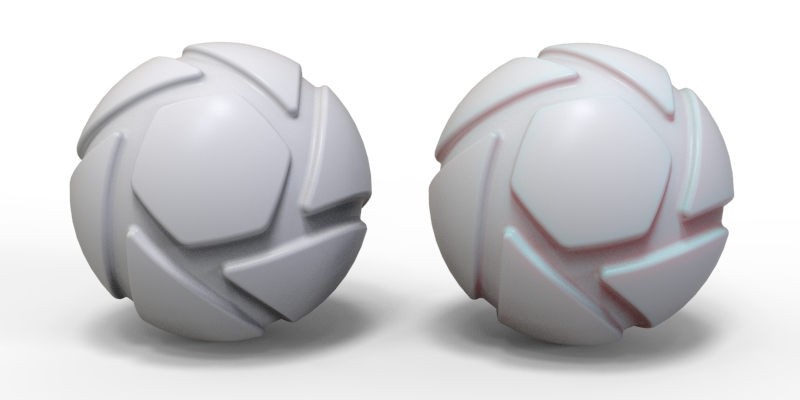
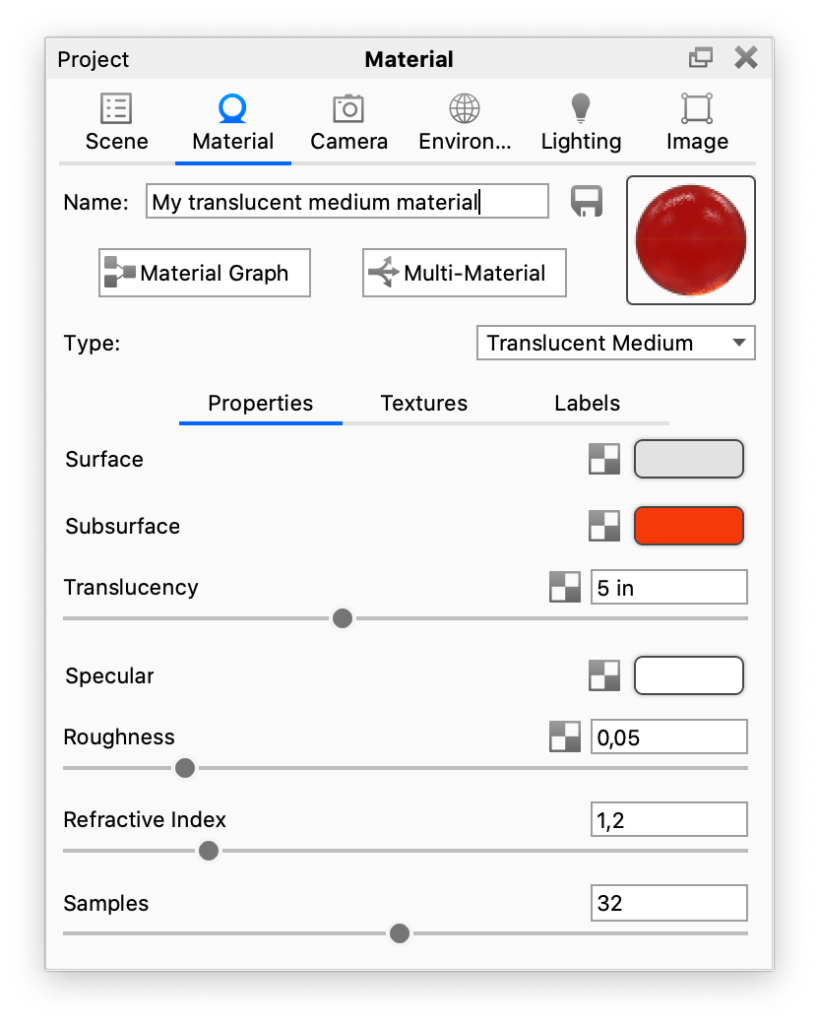
The Translucent Medium material type provides control over subsurface scattering properties that are found in many skin, plastic and other materials. Compared to the basic Translucent material type, this generally will resolve faster.
Surface Color
This controls the diffuse color of the outer surface of the material. Consider this the overall color of the material. Something to be aware of with this unique material type is that you will not see the translucent effect of the subsurface color if the surface color is completely black.
Subsurface Color

This setting controls the color that light will take on as it passes through the material. Your own skin is a great example of the subsurface scattering effect. When a bright light shines through the thin parts of an ear or the thin skin between fingers, the light is colored by what lies beneath the surface and comes back more red.
While the light is passing through the surface, it is bounced around in many random directions. This creates the soft translucent effect rather than the direct refraction effect of glass and similar materials.
For plastic materials, you will often set this color to something very similar to the surface color, but perhaps a bit brighter.
Translucency
This controls how deep light penetrates into and through the surface depending on the units set under Edit > Set Scene Units. The higher your translucency value, the more of the subsurface color you will see coming through the surface. Higher translucency values will also create a softer looking material.
Specular
This controls the intensity of the reflections on the surface. This works together with the Refractive Index setting to further increase or decrease the strength of the reflections on the surface.
Roughness
Increasing Roughness will spread and distribute reflections over the surface and create a more matte surface.
Refractive Index
This controls how much light will bend or refract as it hits and passes through parts that have this type of material. The default of 1.4 is a good starting point, but you can increase the value to create a more dramatic refraction within the surface.
Samples
A low samples setting (8 or lower) will tend to make the surface look more noisy, which will give a more imperfect and rough look. As you increase the value, the noise will even out more and provide a more evenly distributed roughness.


