On this page
KeyShot 10
Top Features
KeyShot Animation Advanced
Smart Export
New UI Features
Other Features
KeyShot Animation Advanced
KeyShot 10 includes a collection of new animation features to advance KeyShot Animation. With these new animation capabilities, you’ll find improvements to the interface and functionality of adding animations. Note that Environments have been added to the Scene Tree and the improvements to the Move Tool, as these correlate with the new KeyShot Animation features.
Keyframe Animation
The new Keyframe Animation allows you to control your geometry movement with sequences of keyframes for better control and more complex visuals. From the Animation Timeline add and adjust keyframes exactly where you need them or record sequences of keyframes to create complex visuals fast.
How it Works
To create a Keyframe Animation, right-click on your geometry in the Scene Tree and choose Add Animation > ![]() Keyframe or launch the
Keyframe or launch the ![]() Animation Wizard.
Animation Wizard.
With Keyframe Animations, the majority of your work will take place in the Animation Timeline. To add a keyframe, select the ![]() Add Keyframe at Current Time icon in the Animation Toolbar, or right-click on the animation node, at your desired time, and select Add Keyframe.
Add Keyframe at Current Time icon in the Animation Toolbar, or right-click on the animation node, at your desired time, and select Add Keyframe.

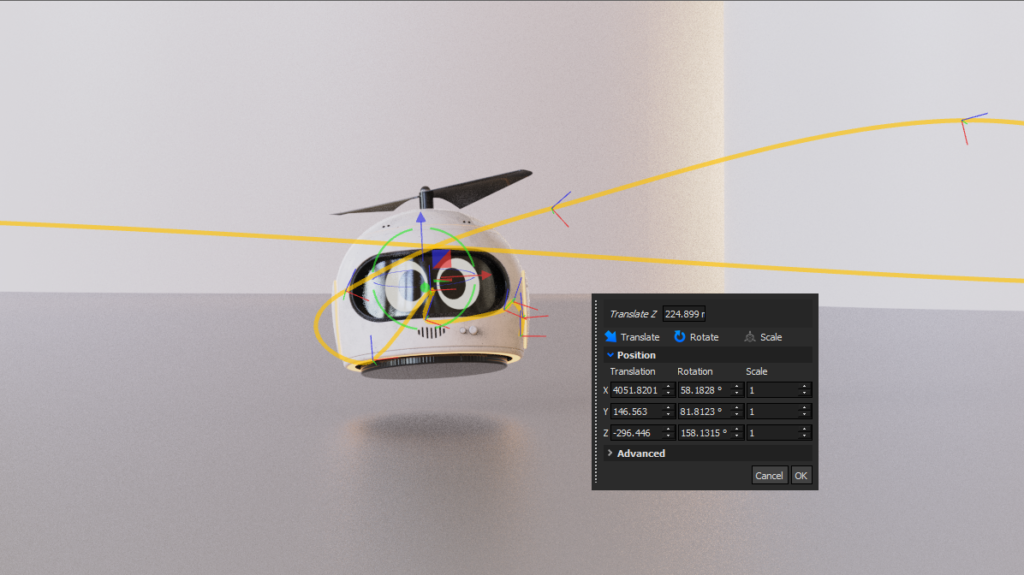
When selected, the keyframe will be orange. Use the Move Tool to position your geometry. The yellow line that appears in the Real-time View represents the path for your object. If the move tool is closed by any action that is not cancel, the modifications will be kept. Note that moving the time in the timeline will deselect the current keyframe and thus close the move tool.
To edit an existing keyframe, select the keyframe in the Animation Timeline. Drag the keyframe along the timeline to adjust the time or use the Move Tool to modify the object’s location. You can cut, copy, paste, and delete keyframes by right-clicking in the Animation Timeline.
Tip
An example of an efficient workflow would go as follows – Select keyframe at 0 seconds, move the object, move the time to 1 sec, add keyframe (this new keyframe will be automatically selected), move the object, move the time to 2 sec, add keyframe, move the object.
Use the Tension slider in the Animation Properties panel to adjust the path sharpness at each keyframe. Just like any other animation, you can adjust the start, end, duration, and motion ease of this animation from the Time Settings section.
Record Mode
Record mode gives you the option to continuously add and edit keyframes without the need for explicitly clicking the ![]() Add Keyframe at Current Time icon. With record mode active, keyframes are automatically created whenever the object is moved at a time where there is no keyframe yet. This is a simplified mode that may feel familiar if you have experience in other CAD programs with similar animation systems.
Add Keyframe at Current Time icon. With record mode active, keyframes are automatically created whenever the object is moved at a time where there is no keyframe yet. This is a simplified mode that may feel familiar if you have experience in other CAD programs with similar animation systems.
To activate record mode, select the ![]() Enter Keyframe Record Mode icon in the Animation Toolbar. Record mode lets you quickly shape the overall path of your animation with fewer clicks.
Enter Keyframe Record Mode icon in the Animation Toolbar. Record mode lets you quickly shape the overall path of your animation with fewer clicks.
Tip
An example of an efficient workflow would go as follows – enable record mode, move the object, move the time to 1 sec, move the object, move the time to 2 sec, move the object.
Sun & Sky Day Arc Animation
Allows creation of a Sun & Sky environment animation where the environment day time is animated.
How it Works
To use this animation, the background of your environment will need to be set to Sun & Sky. From the environment list, right-click on the environment, navigate to Add Animation, and select Add Sun & Sky Day Arc. You also have the option of adding this animation from within the Scene Tree. From the scene tree hierarchy, right-click on your environment, navigate to Add Animation, and select Sun & Sky Day Arc. Lastly, you can find the option to create a Sun & Sky Day Arc Animation from within the Animation Wizard.
In the Animation Properties panel, under the Sun Movement section menu, you’ll notice two settings options – Simple and Advanced. Under Simple, you can adjust the date, start time, and end time by inputting values directly. With Advanced, you can make adjustments to your sun’s path with a keyframe curve. This allows for more complex animations and intricate control. Just as with other animations, you can adjust the Time Settings here too.
In the HDRI editor, you can set specific settings for the Sun & Sky environment, which will alter the animation. Note, you cannot set a custom sun position with Sun & Sky Day Arc animation active.
Environment Rotation Animation
Using one of KeyShot’s many environments or a custom HDRI, this allows creation of a new Environment Rotation Animation to control how the environment light moves across your product.
How it Works
This animation can be created from the environment list and the Scene Tree by right-clicking on the environment, navigating to Add Animation, and selecting Environment Rotation. You can also find this animation within the Animation Wizard.
From the Animation Properties, you’ll find two different editing modes: Simple and Advanced.
Under Simple, just set the desired angle of rotation in degrees.
With Advanced selected, you’ll find a curve editor. Here, you can control in more detail the degree of rotation at a certain point along your timeline. Add different keys and drag out the handles to adjust the tension in order to create more intricate Environment Rotation animations.
Twist – Camera Animation
With the addition of this camera animation, you can now animate the Twist camera parameter.
How it Works
This animation can be created from an existing camera by right-clicking from within the camera list, navigating to Add Animation, and selecting Twist. From the Scene Tree, right-click on the desired camera, navigate to Add Animation, and choose Twist. You can also find this animation option within the Animation Wizard.
From the Animation Properties, set the desired angle of rotation in degrees.
Smart Export
Smart Export is a collection of export functions that makes use of additional sub-features, such as UV Unwrapping and Baking to prepare an asset in KeyShot for use in AR, Mobile and 3D Print workflows. Specifically, the Smart Export in KeyShot 10 supports, USD, USDz, GLB, glTF and 3MF. The formats can be read by number of applications but the most common workflows for each are:
- USDz: USDz is the ideal export format for Apple Devices that utilize ARKit (iOS 12 and above).USDZ is a read-only, 3D file format, defined as a compact single file, containing all the information about the mesh data, binary data, and textures of a model allowing you to easily render it for AR content on mobile devices/websites. Apple devices with iOS 12 and above will be able to view these files automatically.
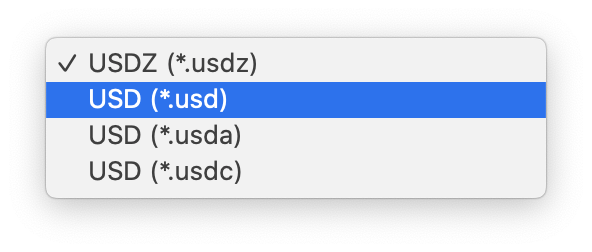
- USD: Additional USD formats are ideal for file interchange between programs where the baked output is required.
- USD: USD files can be either ASCII or binary, and you can rename them USDC or USDA: Devices read the first few bytes to determine the file format.
- USDA: The ASCII format for saving a scene description in text. ASCII itself takes a long time to parse.
- USDC: The binary format of a USD file, USDC files load faster. USDC is necessary for Quick Look to load assets on mobile phones and other devices.
- GLB / glTF
- GLB is a royalty-free 3D file format that’s used in virtual reality (VR), augmented reality (AR), games, and web applications because it supports motion & animation and has small files sizes and fast load times. GLB files are a binary version of the GL Transmission Format (glTF) file, which uses JSON (JavaScript Object Notation) encoding, with supporting data (like textures, shaders) contained in a single file.
- The Khronos Group developed the GLB and glTF formats in 2015. Version 2.0 of the specification added Physically Based Rendering (PBR), which allows shadows and light to appear more realistic and coding updates for speed and improvements in animation.
- 3MF
- The 3D Manufacturing Format (3MF) is a 3D printing format that allows design applications to send full-fidelity 3D models to a mix of other applications, platforms, services and printers. The 3MF specification allows companies to focus on innovation, rather than on basic interoperability issues, and it is engineered to avoid the problems associated with other 3D file formats.
Additional Information:
- USDz / USD – https://graphics.pixar.com/usd/docs/USD-Frequently-Asked-Questions.html
- GLB/glTF – https://www.khronos.org/gltf/
- 3MF – https://3mf.io/specification
Known limitations for Smart Export
Unwrapping
Unwrapping will be slow for instances with high triangle counts (single part with >0.5M triangles) and may occasionally fail for some geometry types (for now – we are trying to fix). The automatic unwrapping works best for non-organic shapes.
Geometry shaders
When exporting with geometry shaders / displacement, parts that are displaced will not get baked textures in KeyShot 10.0
Geometry shaders are currently disabled when baking. This means that occlusion maps for example do not take displacement into account.
Exported material quality
Any material in KeyShot that has subsurface effects or sophisticated angular dependencies or transparency will not be correctly exported. This includes, but is not limited to, translucent materials, thin-film/multi-layer optics and dielectrics in general.
Emissive materials
When exporting emissive materials, they will simply appear with the solid color and not emit light.
Exporting Files with Smart Export
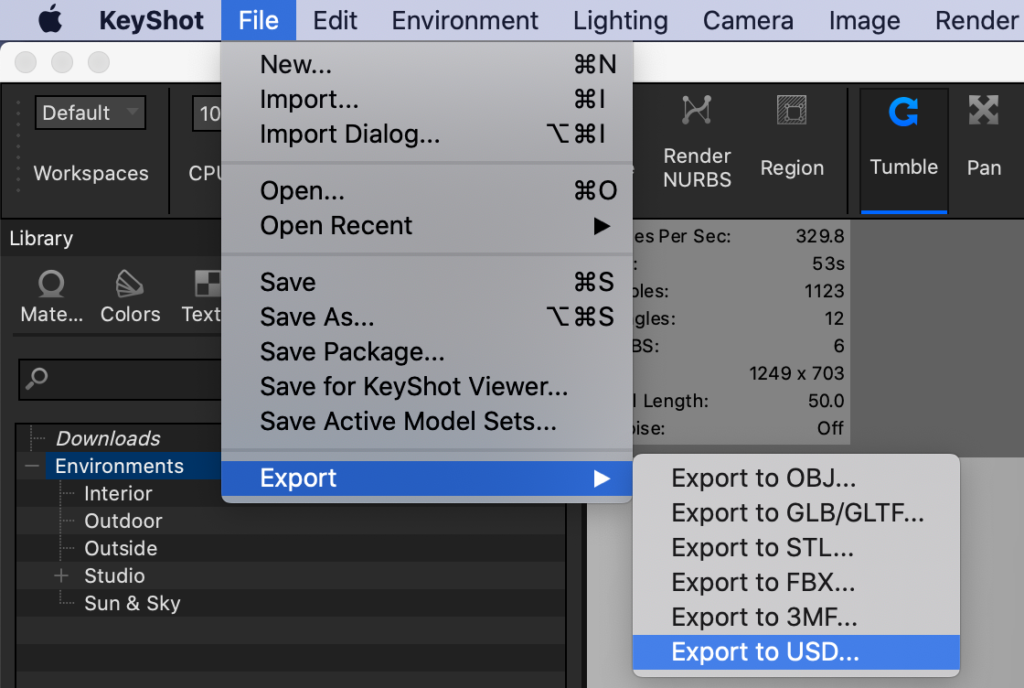
You can export any file from KeyShot to USDz, GLB/GLTF and 3MF using the KeyShot Export Dialog. Located under File>> Export.
Note that OBJ, STL, FBX do not utilize the Smart Export functionality, as they are not baked outputs
USDz
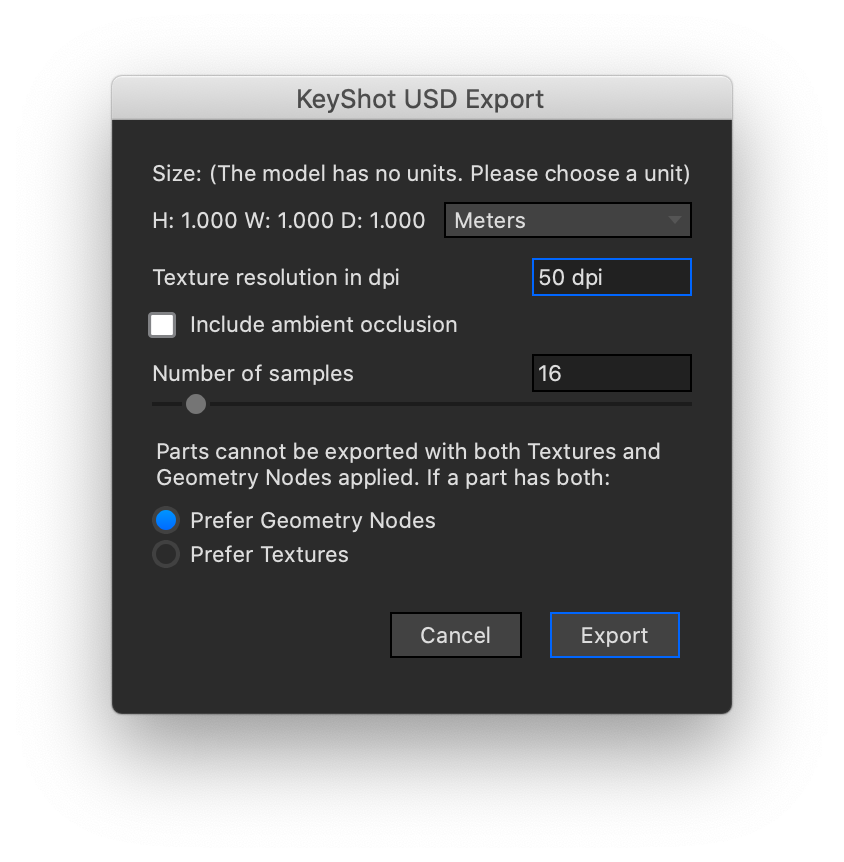
When exporting as USDz the export screen will show the following options:
Size: This is the size of the current Scene Units in KeyShot. If the scene units were not set, the dialog will provide options for scene units on export. When exporting, KeyShot will re-size the textures to match the scene size.
Texture Resolution in dpi: This is automatically set to the optimum dpi settings for the size of your file.
Note
Higher DPI values on large models will result in very large file sizes. For best experiences, mobile and web use, USDz files should be under 75MB.
Include Ambient Occlusion: Toggle this on if you want to include an ambient occlusion texture for each part.
Number of Samples: Defines the number of samples used when baking the textures.
Preferred Output: Textures or Geometry Shaders.
USD, USDa, USDC
When exporting as USD the export screen will show the following options:
Size: This is the size of the current Scene Units in KeyShot. If the scene units were not set, the dialog will provide options for scene units on export. When exporting, KeyShot will re-size the textures to match the scene size.
Note
Higher DPI values on large models will result in very large file sizes. For best experiences, mobile and web use, USDz files should be under 75MB.
Texture Resolution in dpi: This is automatically set to the optimum dpi settings for the size of your file.
Include Ambient Occlusion: Toggle this on if you want to include an ambient occlusion texture for each part.
Number of Samples: Defines the number of samples used when baking the textures.
3MF
When exporting as 3MF the export screen will show the following options:
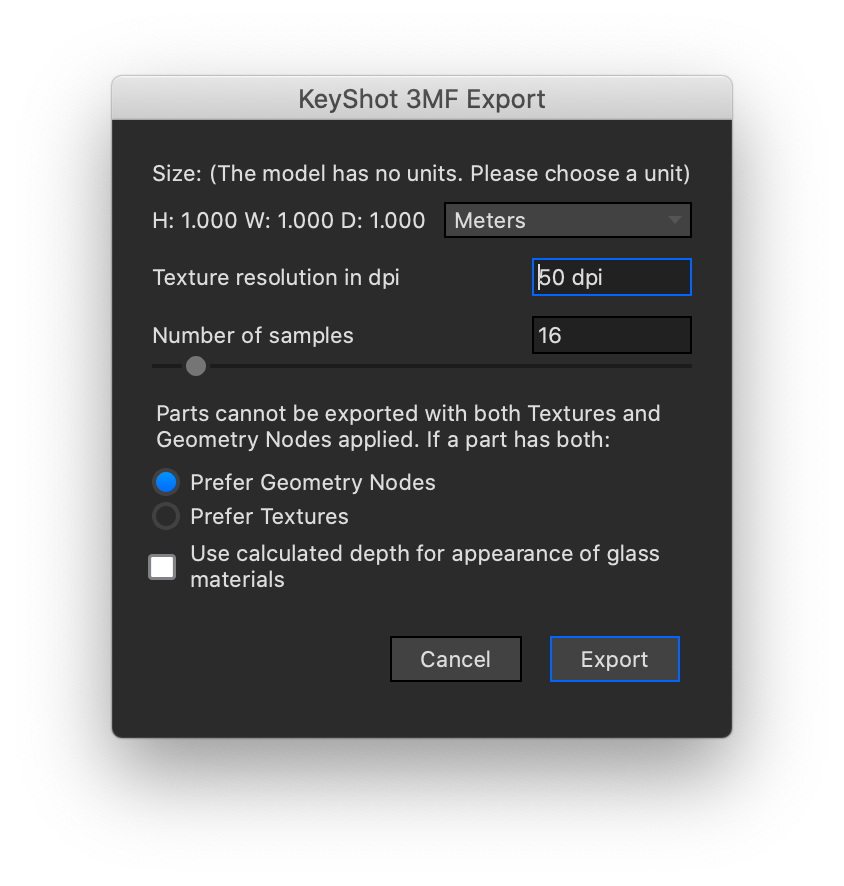
Size: This is the size of the current Scene Units in KeyShot. If the scene units were not set, the dialog will provide options for scene units on export. When exporting, KeyShot will re-size the textures to match the scene size.
Texture Resolution in dpi: This is automatically set to the optimum dpi settings for the size of your file.
Note
Higher DPI values on large models will result in very large file sizes. For best results start with the default DPI setting.
Number of Samples: Defines the number of samples used when baking the textures.
Preferred Output: Textures or Geometry Shaders
Check Box: Use calculated depth for appearance of glass materials.
GLB/GlTF
When exporting as as GLB or glTF, you select the file type in the file type drop down, after which the export screen will show the following options:

Size: This is the size of the current Scene Units in KeyShot. If the scene units were not set, the dialog will provide options for scene units on export. When exporting, KeyShot will re-size the textures to match the scene size.
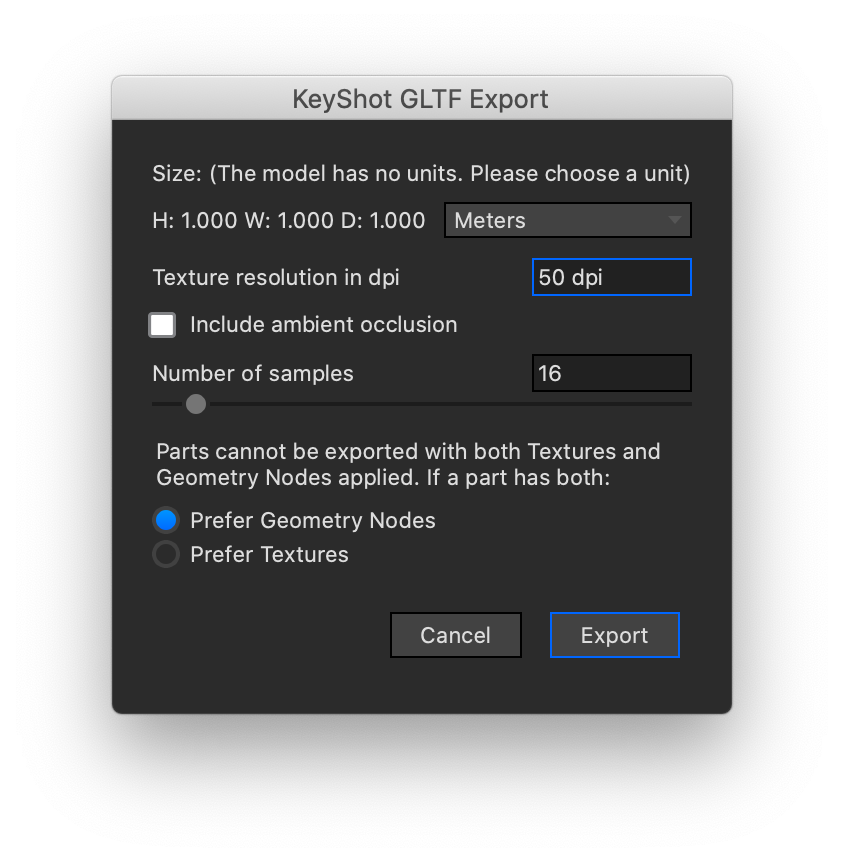
Texture Resolution in dpi: This is automatically set to the optimum dpi settings for the size of your file.
Note
Higher DPI values on large models will result in very large file sizes. For best experiences, mobile and web use, USDz files should be under 75MB.
Number of Samples: Defines the number of samples used when baking the textures.
Preferred Output: Textures or Geometry Shaders
Move Tool Improvements
How it works
Move tool improvements include new move tool UI as well as the ability to dock the move tool window or move it freely from the real-time view. With the move tools new UI, the familiar translate, rotate and scale mode check-boxes have been replaced by their corresponding icons. However, they can still be found at the top of the window while settings are now located under the Position and Advanced accordions.
Position
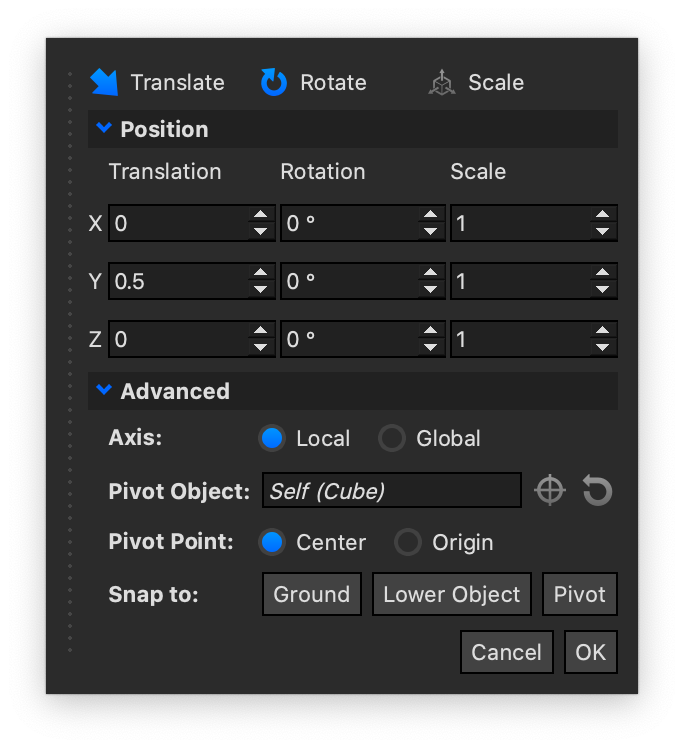
The Position accordion enables numerical adjustment of part or model location using the X,Y,and Z input fields. Previously, these adjustment settings were only found in the Position tab located under the scene tree in the Project Panel.
Advanced
Advanced settings include Axis, Pivot Object, Pivot Point, and Snap to options. These are the same available options found in previous KeyShot Move Tool UI’s. However, they are now located under the Advanced accordion.
New move tool improvements have also enabled accurate tracking of mouse movements when moving or scaling a model using the move tool. In previous versions, model and part movements did not move in a 1:1 manner to the cursor. This was particularly noticeable at steep camera angles. KeyShot 10’s move tool improvements have solved this issue.
Solo Mode
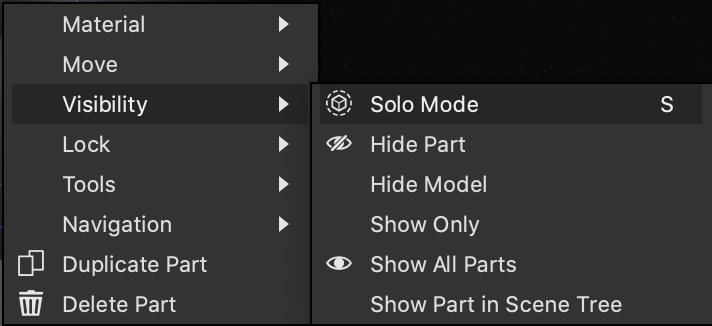
Solo Mode allows you to work on one or more parts individually, without disrupting the hierarchy of any other hidden parts. This doesn’t take away from any current workflows, but rather supplements and improves upon what exists in previous versions of KeyShot.
How it Works
Select a part or parts, right-click and select Solo Mode or use the hotkey S with a part selected. Once active, a blue label will appear at the top of the real-time reading “Solo Mode”. This allows you to isolate and hide/show parts without the need for locking.
Light Gizmos
New light gizmos allow for fast, on-the-fly adjustments of physical lights in the Real-time View and Geometry View with gizmos for Spotlights, IES Lights, and Point Lights, which can now also be added through the edit menu.
How it Works
Spotlights The new light gizmo on Spotlights lets you interact within the Real-time View and Geometry View to adjust the Beam Angle, Falloff, and Radius. Simply drag the handles in order to make adjustments. This Gizmo consists of three circles. One expands from the center of the light source and controls the radius of the Spotlight. The second and third circles are designed to show/control the Beam Angle and Falloff area. The greater the difference in diameter between the two, the more falloff the light source has. The Light Gizmo for Spotlights also includes a vertical handle that allows the projection of the Light Gizmo controls for Beam Angle and Falloff to be adjusted.
IES Lights The new light gizmo for IES Lights improves interactivity in the Real-time View and Geometry View. You can adjust the Length and Width of the IES light by dragging the handle from the center of the light source. Adjustments made solely to one or the other will appear as a blue line in either the X or Y axis. If both parameters receive adjustments, a Blue square will be visible in the real time view to graphically represent the shape of the projected light.
Point Lights The new light gizmo for Point Lights improves interactivity in the Real-time View and Geometry View. You can adjust the Radius for this light by dragging the handle outward from the interaction point in the center of the light.
Handles are easily identifiable as points that illuminate red when the cursor is hovered over. If a point is illuminated, you can interact with that point to make adjustments to your light.
Light Manager
The new Light Manager in KeyShot 10 allows you to control all scene lighting from one location. The dockable panel allows you to choose and adjust your environment lighting or control the visibility, color, power, and size of any physical light.
How it Works
You can find the Light Manager in the Ribbon, under Main Menu > Window > Lights Manager, or by using the hotkey Shift+L. To use a light editing focused workspace, where you can find the Light Manager, navigate to the Workspace drop-down in the Ribbon and choose Lighting.
Within the Lights Manager window, you’ll find access to all of the physical light sources in your scene. Here, you can adjust many of the same settings that you would find in the Material Properties, such as color, power, radius and more.

Rendering Improvements
KeyShot 10 offers updates to several rendering related features. These include updates to Caustics, Denioser and Automatic Firefly Removal.
- Caustics
- How it Works: Caustics have been improved to converge faster. Both on CPU and GPU but most noticeably on GPU. The speed of convergence is also less dependent on scene size, making caustics for large scenes faster to calculate.
- Denoiser
- How it Works: New updates have introduced albedo (diffuse) and normal information to the Denoiser in the real-time view. This makes the Denoiser results identical in both real-time and rendered image.
- Firefly Removal
- How it Works: Located in the Image Tab, within the Denoise section, you can find the Firefly Filter. When Denoise is checked, simply adjust the Firefly Filter slider to remove any artifacts.
- Smooth Global Illumination
- How it Works: This option controls whether interior mode will smooth the indirect illumination internally (as it has done for a long time) or not. For many interiors it would be better to omit this type smoothing and instead rely on the more recent image denoising.
- Generally speaking, the newer image denoising works well so that this option should rarely be needed anymore, but we have kept it for backwards compatibility. If you are rendering interiors then you can try to uncheck it and instead use image denoising to get a smoother result faster.
Examples of these rendering improvements are included below.
Caustics Examples
KeyShot 10 vs KeyShot 9
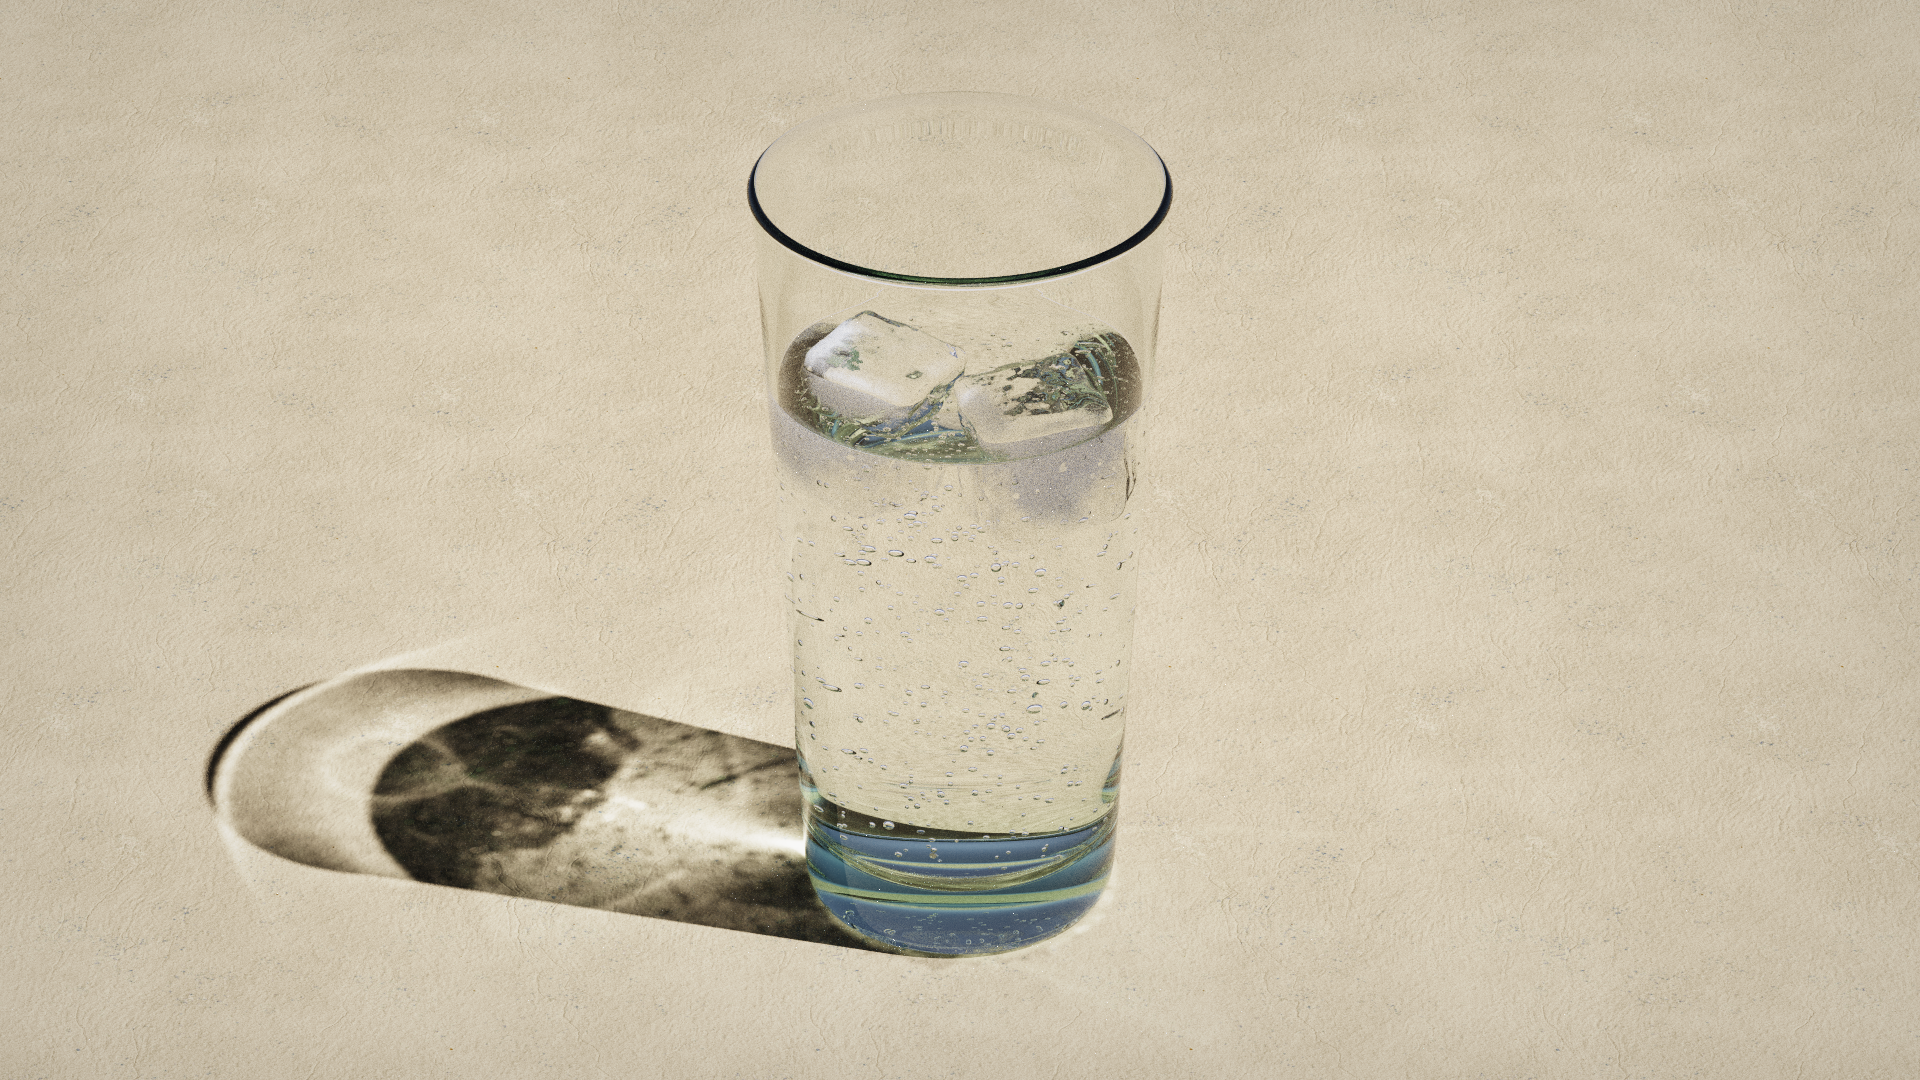
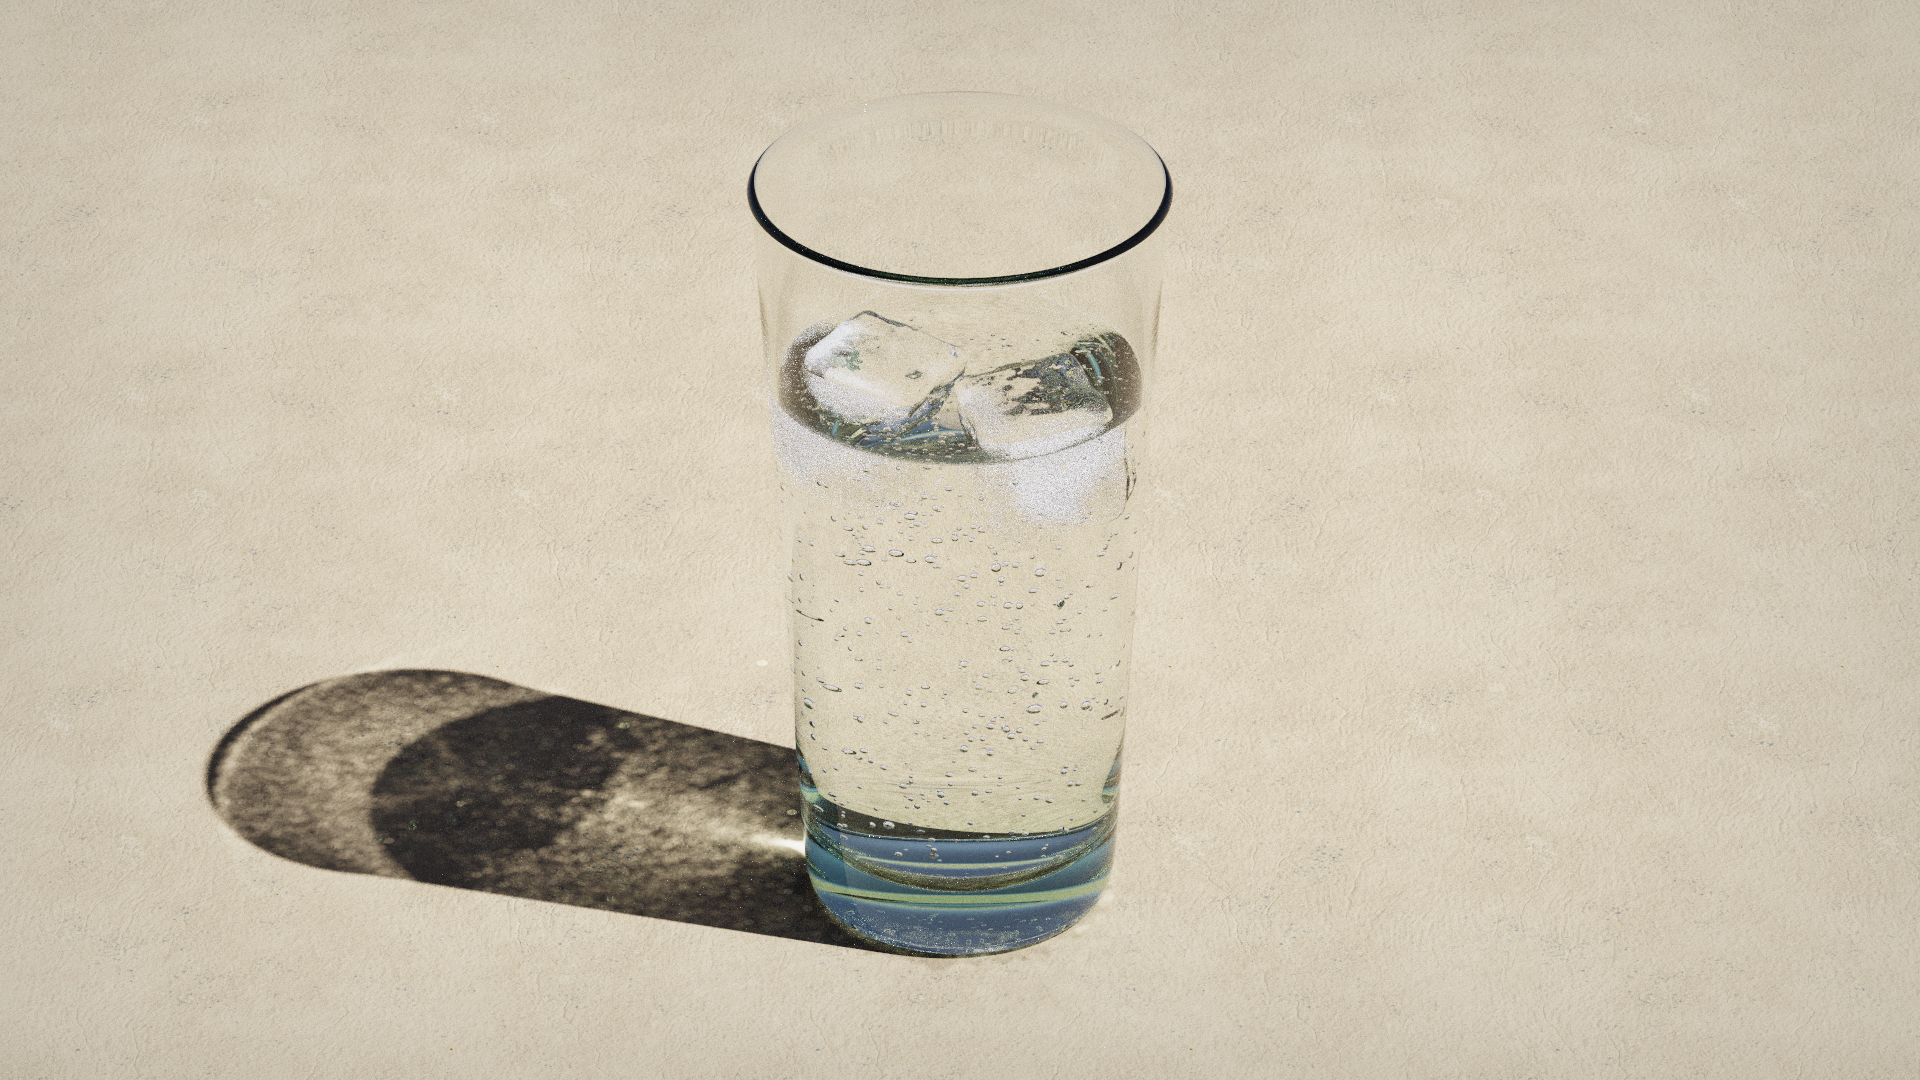
On the left: KeyShot 10 GPU Mode, 128 samples, on the right: KeyShot 9 GPU Mode, 128 samples.
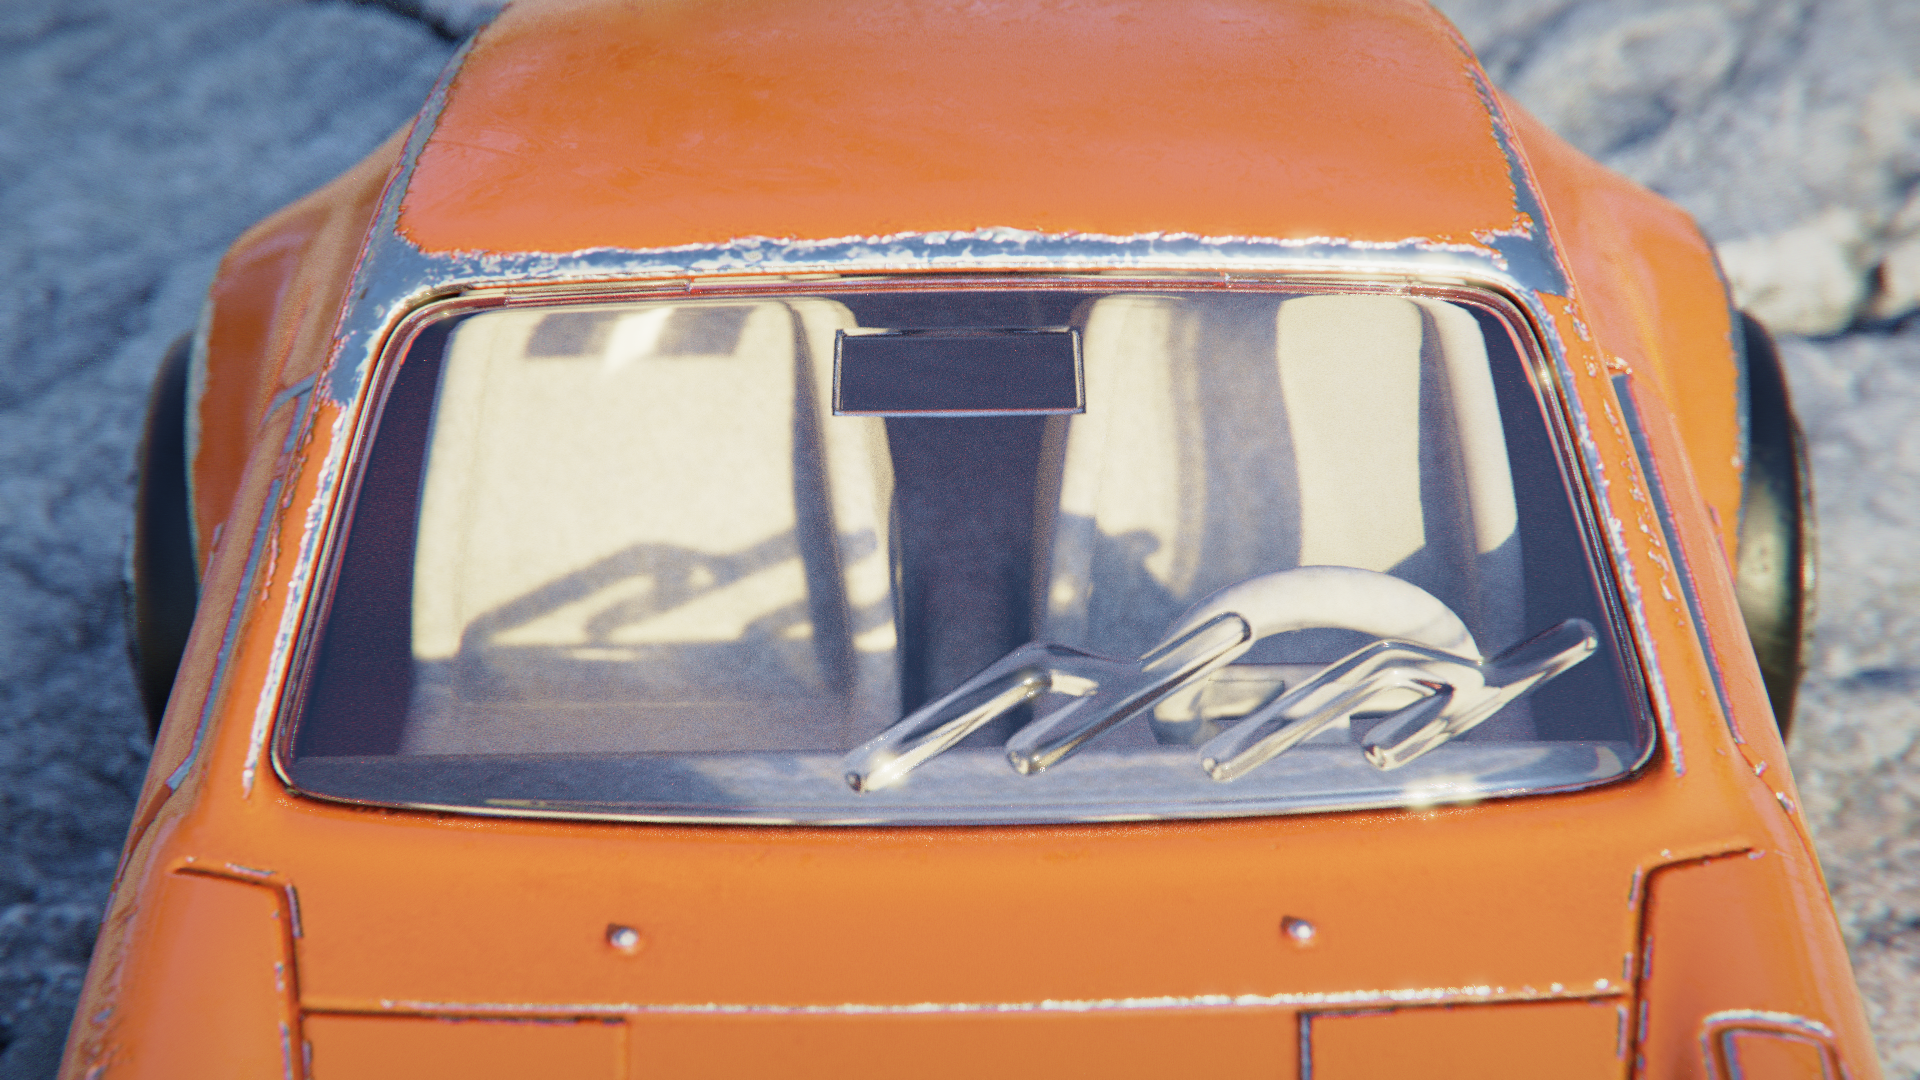
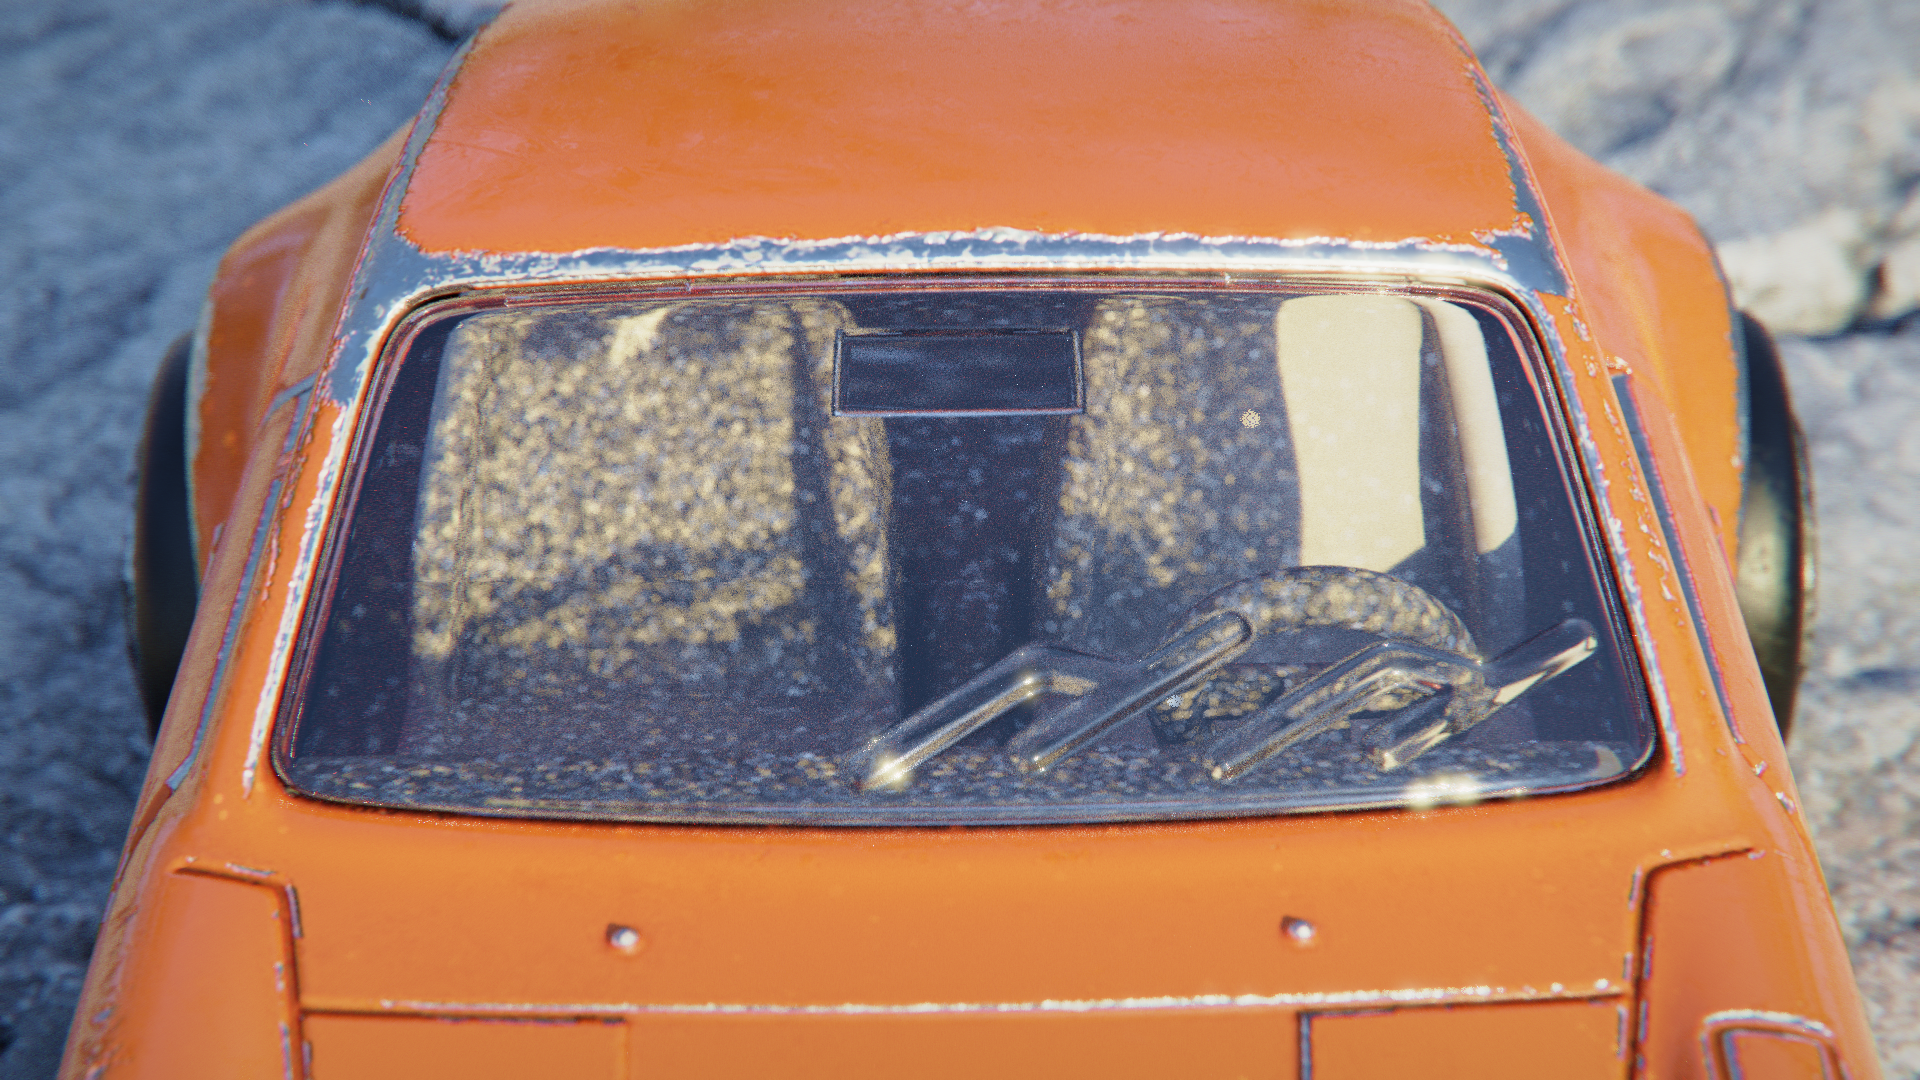
On the left: KeyShot 10 GPU Mode, 128 samples, on the right: KeyShot 9 GPU Mode, 128 samples

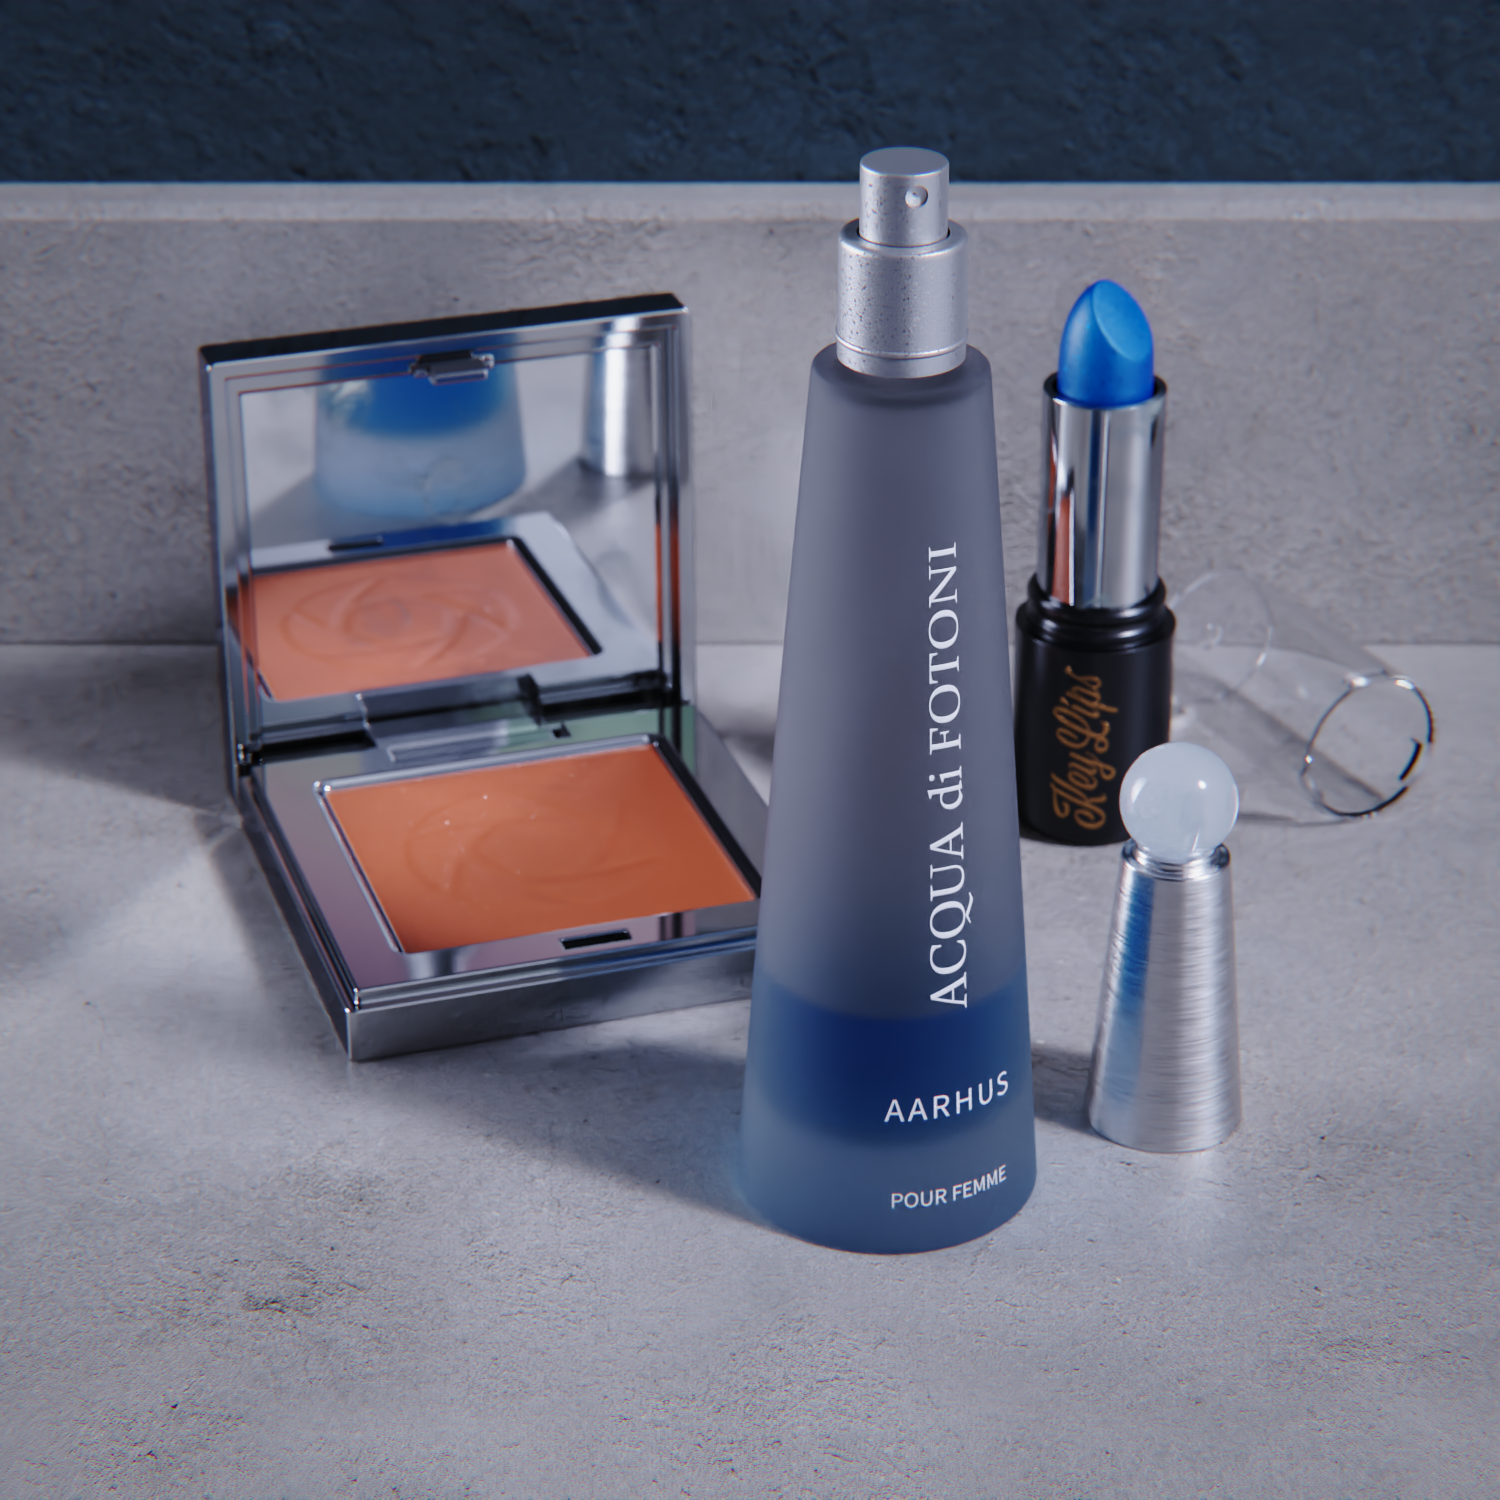
On the left: KeyShot 10 GPU Mode, 128 samples, on the right: KeyShot 9 GPU Mode, 128 samples
Firefly Removal Examples
Firefly Filter
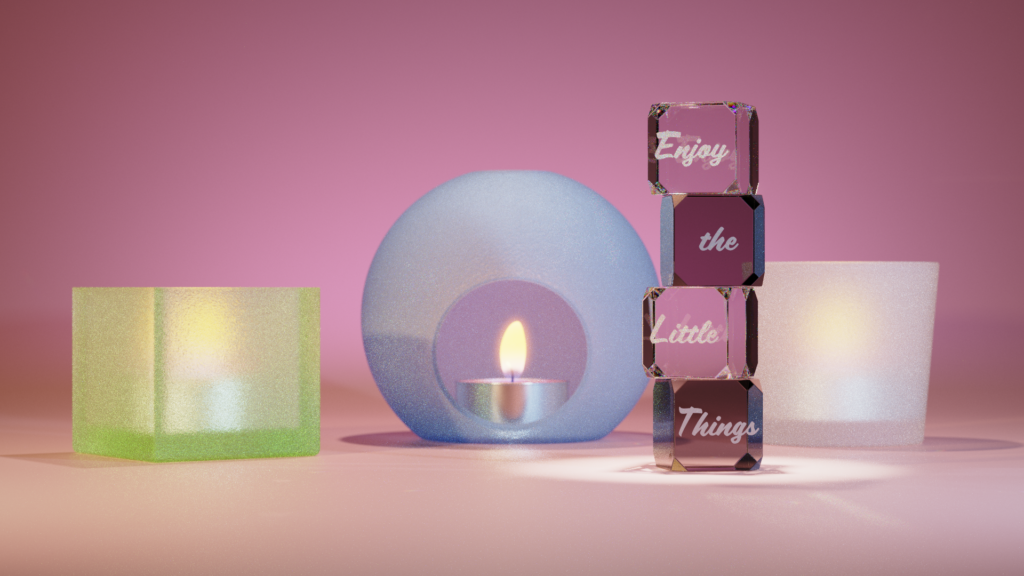
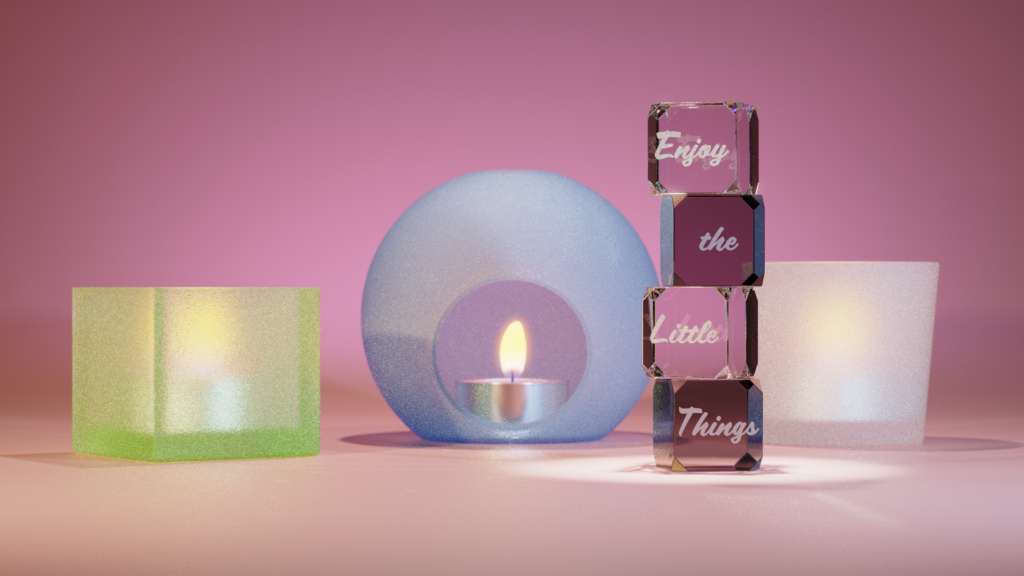
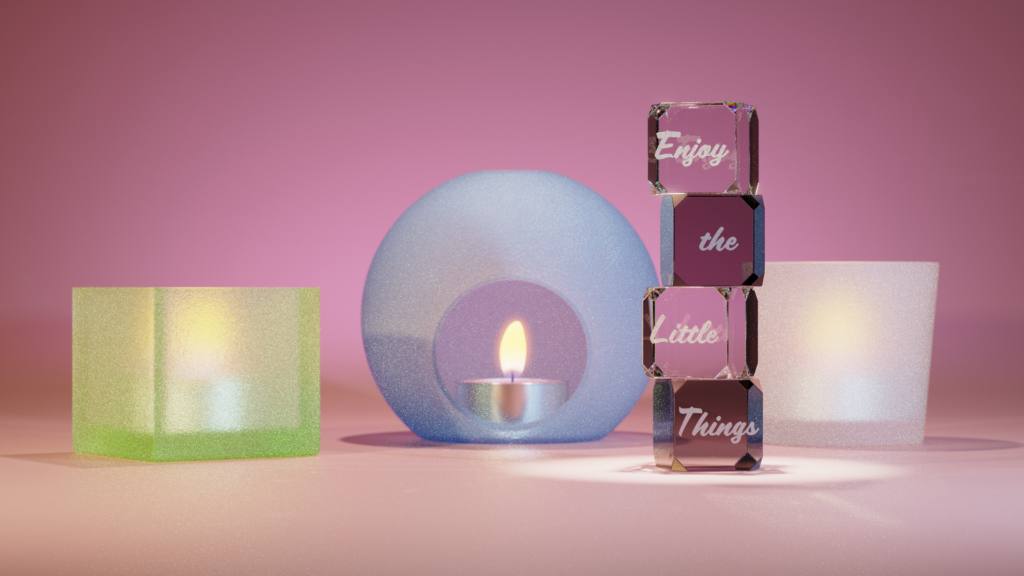
To access the Firefly filter, select the Image tab, navigate to the Denoise section and check the Denoise check box. Once activated you can adjust the slider, between 0 and 1, for the amount of FireFly removal.

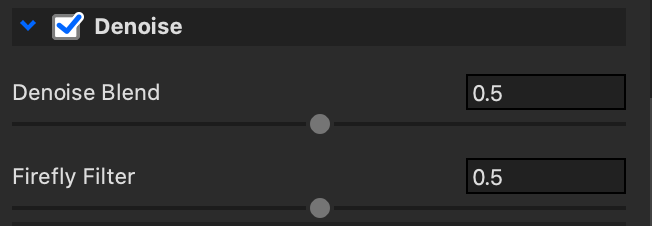
The examples below show the Firefly applied at 1, 0.5, 0.2 and 0.0
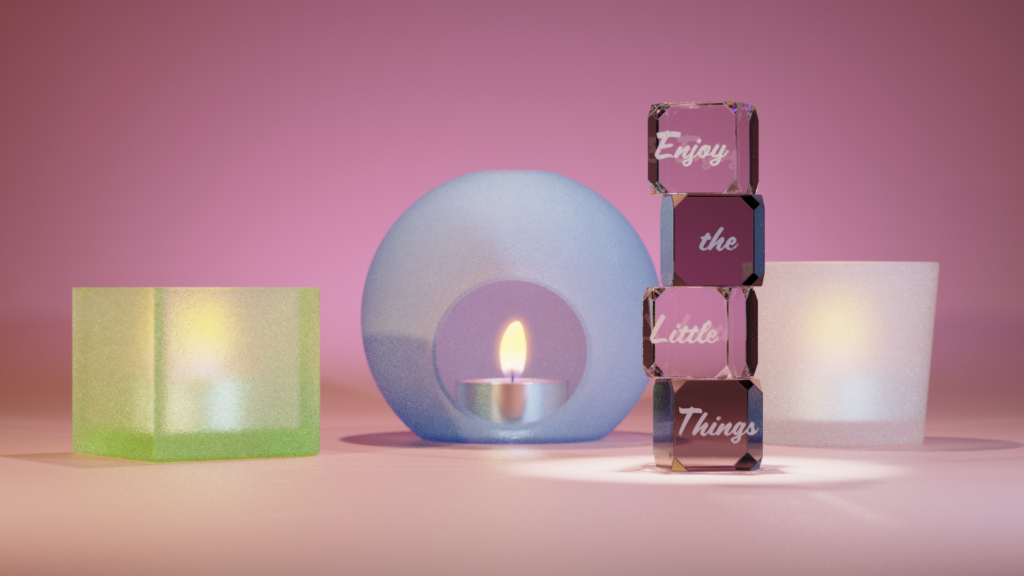
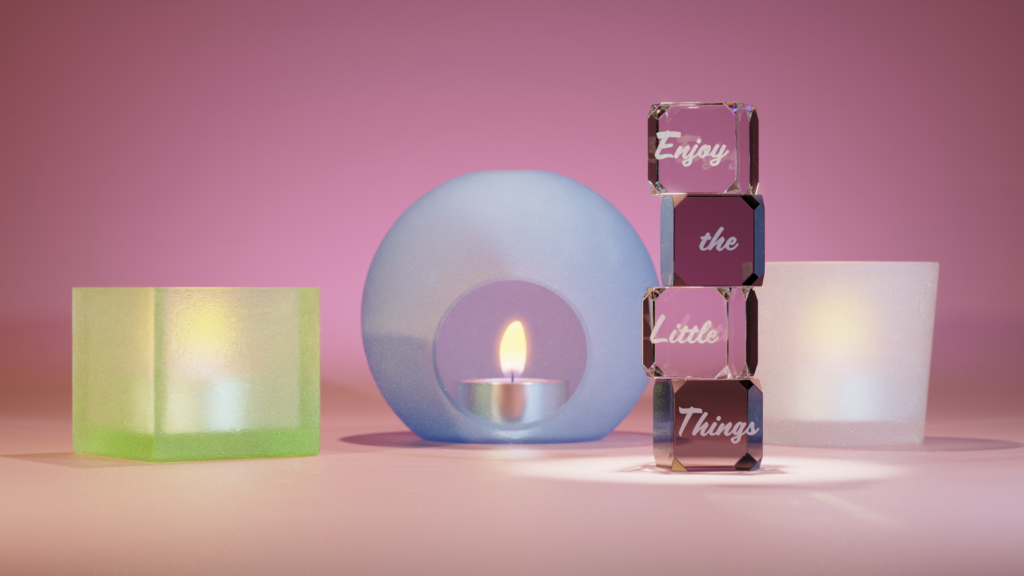
Denoise + Firefly Filter
These examples show the effect of Denoise and Firefly both being enabled.
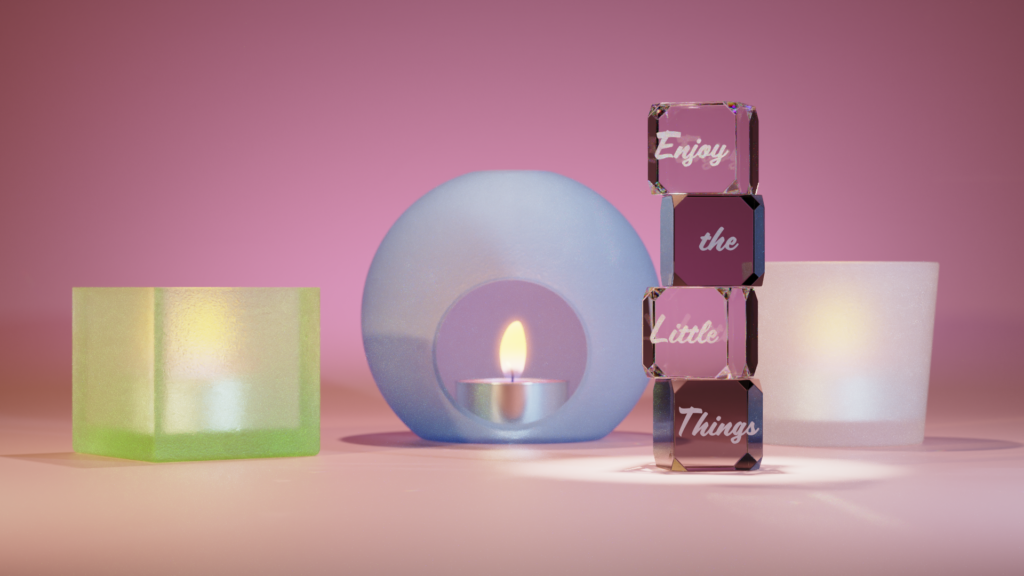
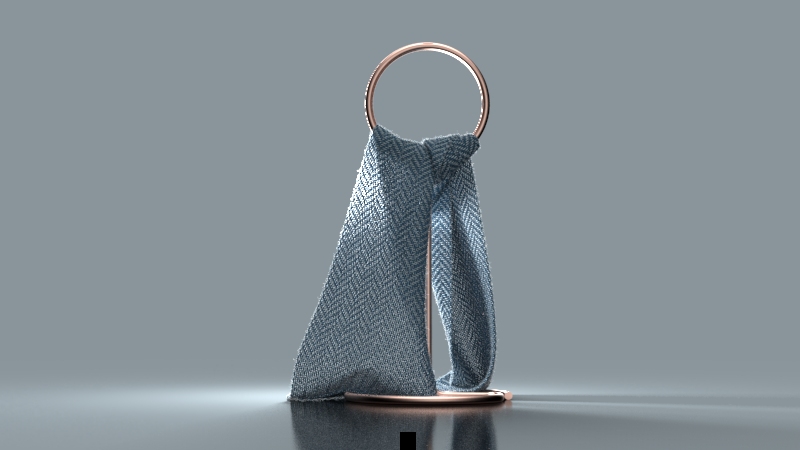
RealCloth™ 2.0
KeyShot 10 RealCloth™ has received a series of new UI updates as well as processing updates that allow for better control over RealCloth applications, as well as increased fiber-level details.
These UI updates include, new interface for weave presets and pattern editing, display options that allow the user to switch between ( single sided, two sided, and 3d Ply geometry ), and the ability to swap front and back normals as well as add transparency to weave.
How it Works
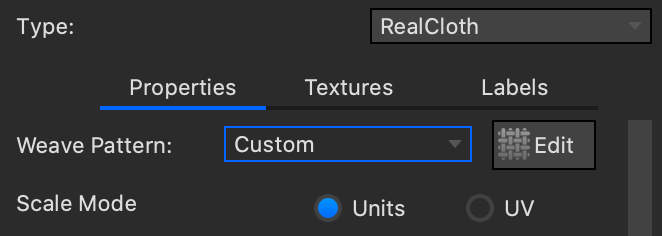
Edit weave Pattern button has been removed and broken into two separate parameters which are now located under the properties sub-tab at the top of the RealCloth Properties. To the right of “Weave Pattern” you will find the weave dropdown that allows you to choose between custom and preset options. To the immediate right of that, there is an edit button with a weave pattern icon on it. By clicking this button, the familiar edit weave pattern window will appear in your workspace.
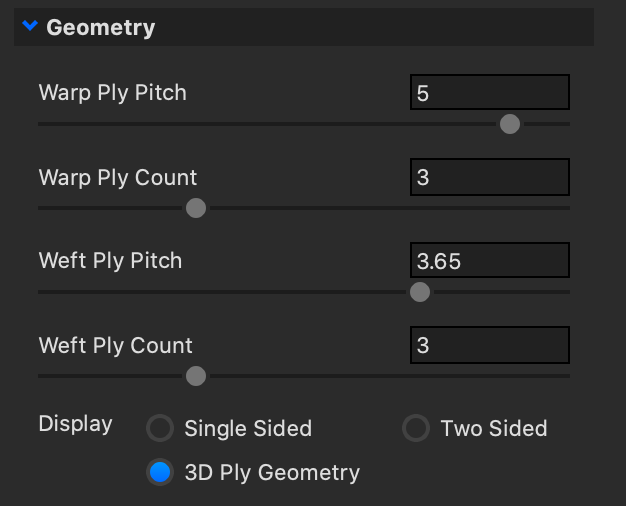
Display Options can be found under the geometry accordion. These options allow you to set geometry as one sided, two sided, or as a 3d ply which creates yarn like geometry for the most realistic representation of individual threading. Under the display options a “Swap Front and Back” checkbox can be found which will swap the direction of RealCloth normals.
Flip Normals
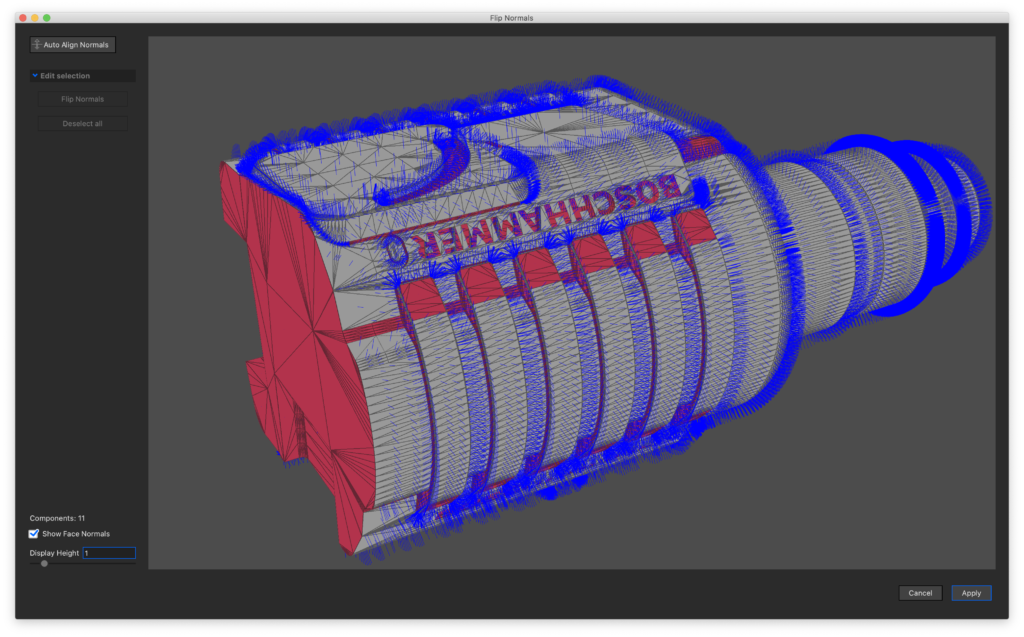
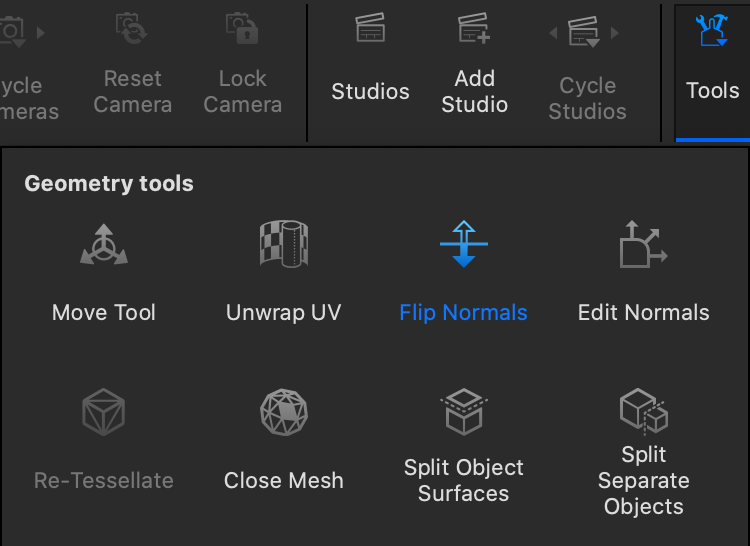
The Flip Normals tool allows you to automatically or manually reverse the direction of the normals on an object by selecting its faces.
How it Works
Launch the Flip Normals tool from the Tools menu in the Ribbon. Your selected part will appear in this window. To view the current direction of your normals, check the Show Face Normals box. You can adjust the Display Height of the face normals with the slider.
The Flip Normals tool gives you the option to Auto Align Normals, but for more complex geometry, you can manually select faces under the Edit Selection section. To apply the changes, choose Apply. Note, you cannot undo this action.
