On this page
Textures enable you to map images/procedural textures to materials, in order to create detailed effects such as wood grain, meshes, tile as well as fine imperfections like scratches, which will add that little “extra” to your renderings.
In this section we will cover the various types of textures, the way they are mapped both in regards to the the appearance and the position on the parts.
Adding textures
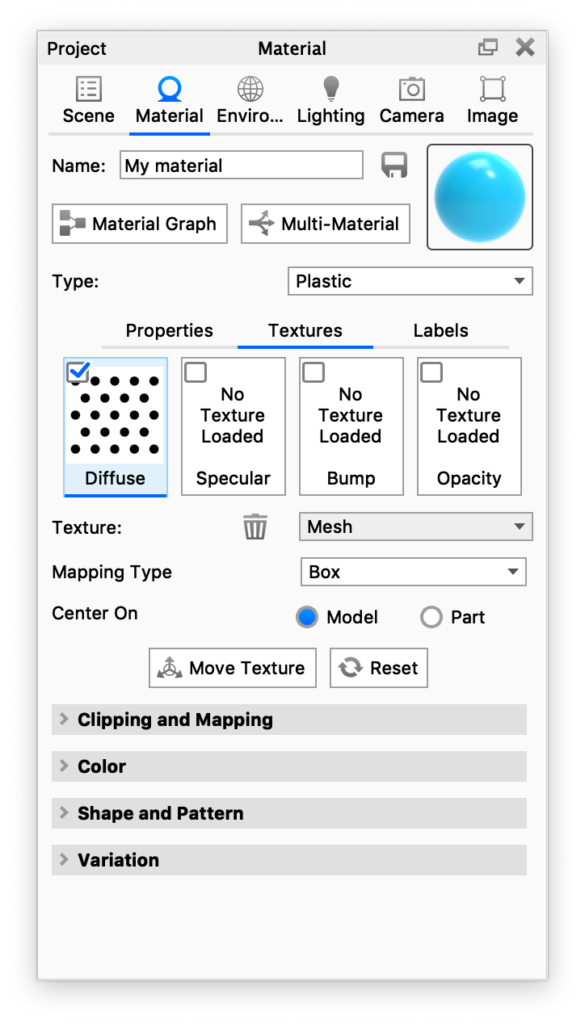
The textures of a material are located in the Texture tab of the Material panel. You can apply textures from the library, select local files or create/adapt textures based on the texture types (2) found in the panel.
1. Add textures from the Library: KeyShot comes with a number of textures which can be found in the Texture Library in the Library window – and more can be downloaded from KeyShot Cloud.
- Drag the texture onto the part you want to apply it to in the Real-time view a map dialog will appear, where you can select which Map type you want to texture used as.
- Drag the texture directly onto the relevant Map type in the material panel.
2. Add textures from file: If you want to use an image from your local directory, you can do it in various ways
- Double click the relevant map type and browse to the file.
- Select the map type, click the folder icon and browse to the file.
- Drag an image from outside KeyShot onto the part in the Real-time View and a map dialog will appear, here you can select which Map type you want to texture used as.
- Drag an image from outside KeyShot onto the relevant map type in the Material panel
3. Create/adapt textures based on the texture types: Below the the Map types you can find the Texture Type drop-down. In addition to the regular image texture it offers advanced image textures (eg. video maps) as well as 2D and 3D Procedural textures. Select a type and adapt it to fit your purpose.

Tip
If you want to change the material but keep the textures you have applied to it. You can hold the Alt-key when you drag and drop the new material from the library/outside KeyShot onto the part in the Real-time view.
Working with Textures
- Mapping Type: Via the Mapping Type drop-down you can select the method for mapping the texture that fits your object best.
- Move textures: To get the position and size of the texture just right, you can launch the Move Texture widget. This will let you adjust the mapping parameters from the Real-time View.
- Copy textures between Map types: In some cases it makes sense to use the same texture on multiple Map types, you can easily copy a texture from one to another, simply hold Ctrl/Cmd while dragging the thumbnail from one map type to another.
- Sync textures: If you want to make sure the textures are kept synchronized make sure to check the Sync checkbox for each map type
Removing textures
If you for some reason want to remove a texture from the material you can do it in 2 ways:
- Disable: Unchecking the check box in the upper left corner of the texture map will disable the texture, so you can see the material without the texture applied, without loosing all the work you have put in, to customize the texture.
- Delete: If you wan to remove a texture completely from the material, simply select the map type, and hit the
 delete icon.