On this page
Create a pattern of shapes that can be used for meshes in the opacity map, or a shape pattern in color maps.
Clipping and Mapping
Clipping width/height
If clipping has been enabled for the texture, this is where you set the size of the mesh texture.
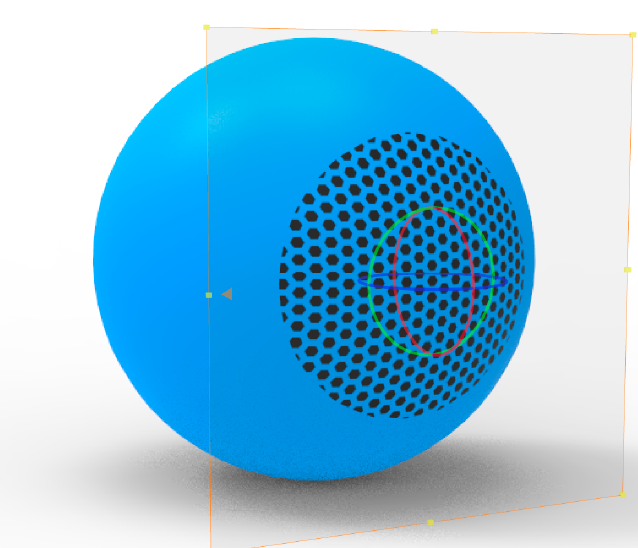
Depth (planar mapping only)
If you don’t want the texture to apply to the entire object you can limit the dept of the texture. This way the texture will only apply to the areas on the surface that are within the depth measured from the position of the texture.
In the example, the planar texture is positioned exactly on the surface and has a depth of 0,2cm (the sphere is 2cm).
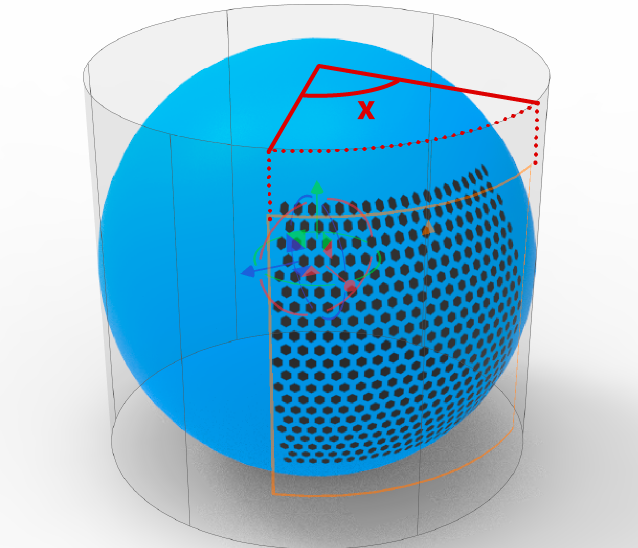
Wrap (Cylinder mapping only)
This determines width of the map that is wrapped around the cylinder, set by an angle measured from the center of the cylinder. The height will match the width.
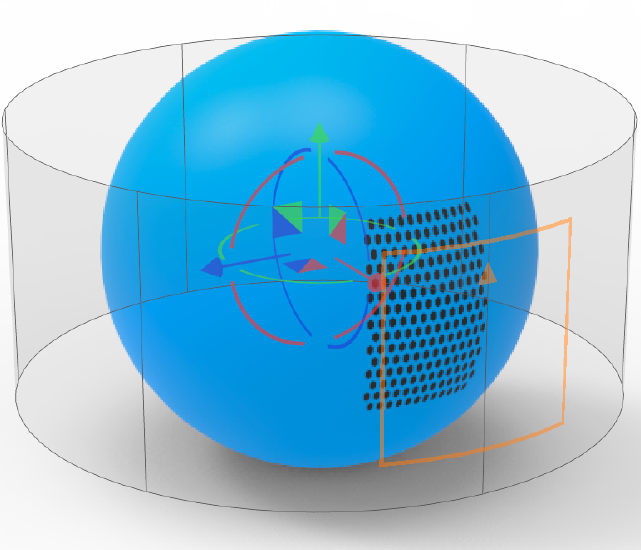
Diameter (Cylinder mapping only)
This will adjust the diameter of the cylindrical map, measured from the center. If you want the diameter to match your object you can launch the Move Texture widget and press Fit to X/Y/Z.
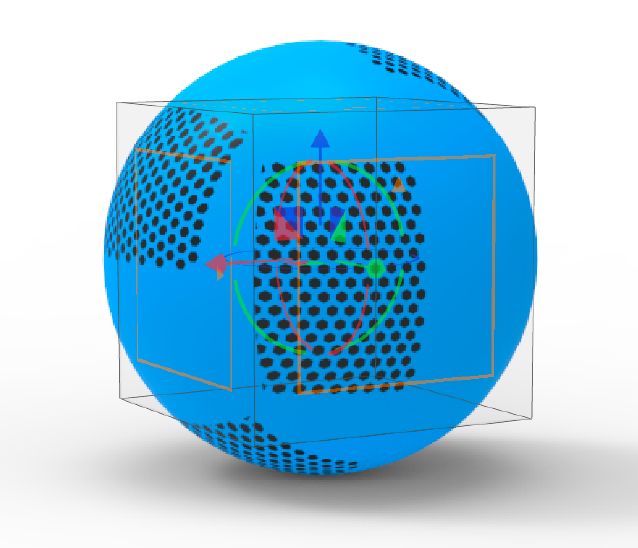
Shift U / Shift V (Box, Sphere, UV and Camera mapping)
Offsets the texture in the U or V direction without moving the center.
In the example the texture has been shifted -0,5 in the U-direction.
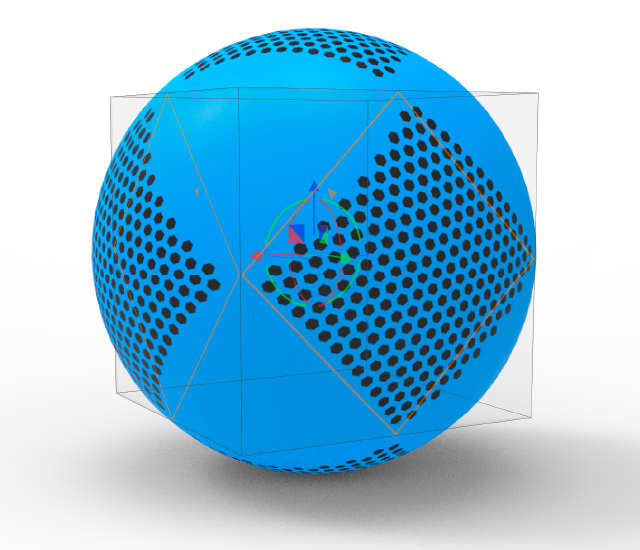
Angle UV (Box, Sphere, UV and Camera mapping)
This will rotate the UV plane of the Map.
In the example the texture is clipped and the UV is angled – notice the orange squares are rotated.
Angle
This will rotate the entire map around the local Y axis. This is the same as rotation in the Move Texture tool the texture will be rotated around the green Y axis.
Expand the setting for even more precise control.
Axis Tilt
This will tilt the local axes around the Global X axis.
Axis Azimuth
This will rotate the map around the global Y axis
If the tilt is 0 adjusting the azimuth will be the same as adjusting the overall angle.
Center X
Will move the center of the map along the global X axis.
Center Y
Will move the center of the map along the global Y axis.
Center Z
Will move the center of the map along the global Z axis.
![]() Flip Horizontal
Flip Horizontal
Will mirror the texture over the local Y axis.
![]() Flip Veritcal
Flip Veritcal
Will mirror the texture over the local X axis.
![]() Two Sided
Two Sided
This is only relevant for Planar and Box Mapping and has sightly different behavior for the two.
- Planar: When enabled the texture will be visible on both sides of the model, with a mirrored version on the “backside”.
- Box: when enabled the texture will be mirrored on the back faces of the box, when disabled the texture is the same on all faces.
Clip Horizontal / Clip Vertical
Enables clipping of the texture, so it is not covering the whole height/width of the object. When enabled the values can be controlled by Clipping Width/Height.
![]() Sync
Sync
Textures on this material node with sync enabled will be scaled/moved/adjusted concurrently.
Color
Color
This sets the shape color. Set the color to black to create holes if you are using the texture as an opacity map.
Background
This sets the background color. Set the color to white if you are using the texture as an opacity map.
Show Outline
This enables you to add a colored/textured outline to the shape. The outline is placed on the inside edge of the shape.
Blend Outline with Color
When enabled the outline color/texture is blended with the color/texture of the shape.
Outline Size
Determines the width of the outline on a scale from 0-1, where 0 is right on the edge and 1 is in the center of the shape.
Shape and Pattern
Scale Mesh
Scales the size of the mesh affects both the size of the shape and the spacing.
Shape
Here you can choose between different shapes for your mesh.
Falloff
Adds feather to the edges of the shapes. The slider sets the width of the falloff. A value of 0 is equal to no falloff.
Shape Diameter/Width and Height
Depending on the shape size you can set the size of the shapes with diameter/width and height. When setting the width and height you can ![]() lock aspect to scale uniformly and
lock aspect to scale uniformly and ![]() reset to revert to the original aspect ratio.
reset to revert to the original aspect ratio.
Shape Angle
This will rotate the shape.
Mesh Pattern
Set the pattern you want to use for your mesh. You can either choose one of the standard patterns or define a custom pattern.
Variation
Jitter
Increase this value to add deviation to the pattern.
Distort
Increase this value to randomly distort the shape.
Distort Scale
Values above 1 decreases the distortion scale. Values below 1 increases the distortion scale.