On this page
If you want your computer to serve as a worker on the network, you can enable this in the  KeyShot Network Configurator. When you enable worker mode, you will need to set the manager hostname and worker Port, Process Priority and the Allowed Cores.
Once you have the worker set up you can log into the Monitor and set the Worker Schedules. If you are also using the computer for other things you can use the Worker Tray widget to limit the number of cores or pause the worker temporarily.
Setting up the Worker
Launch the Network Configurator on the computer where you want to set up/edit the worker.
General Settings
Interface Settings – Select the Language and Theme color both of the Network Configurator and the Monitor
Resources Location – KeyShot Network Rendering creates a Resources folder where it stores log information, system and temporary files.
Default location of the Resources folder:
- On Windows:
C:\Users\Public\Public Documents\KeyShot10NetworkResources - On Mac:
/Library/Application Support/KeyShot10NetworkResources
If necessary you can change the location of the resources folder, but it is not recommended to do so.
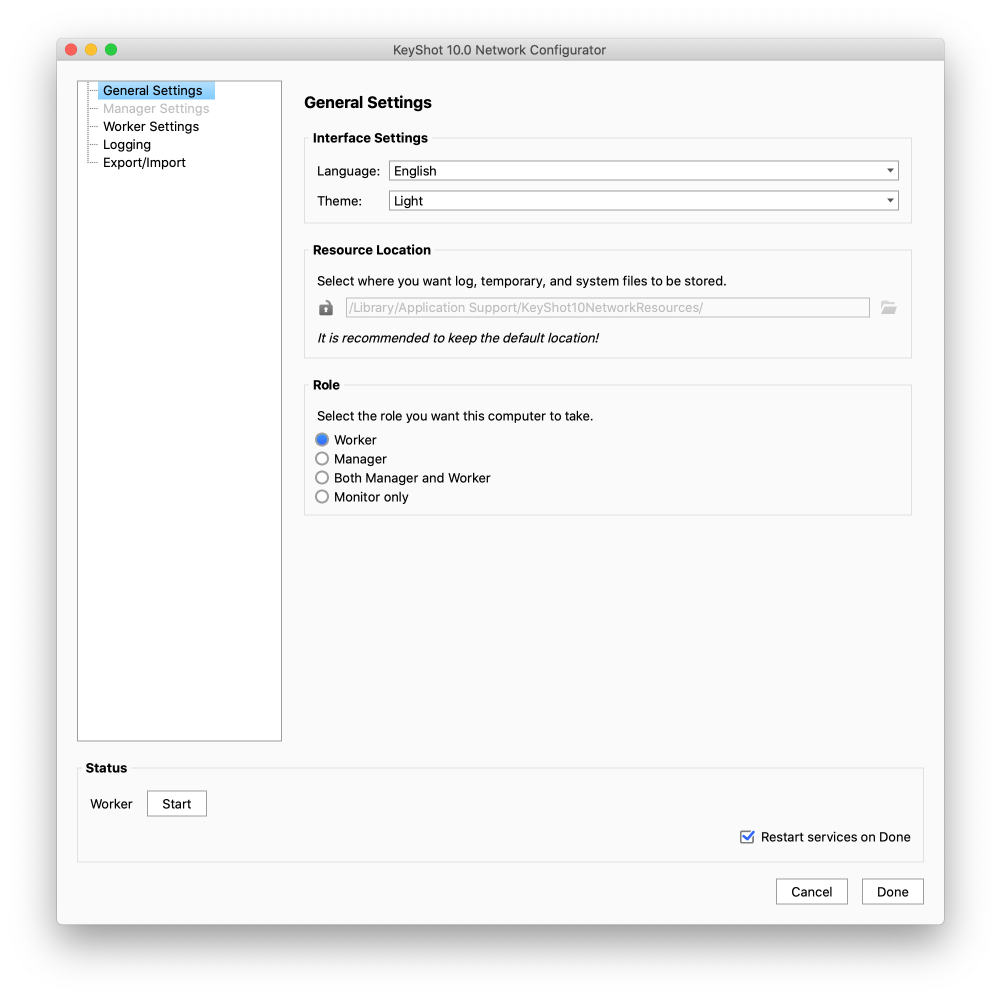
Role – Select the Worker Role. Now the relevant settings for the Worker are available in list in the left of the window.
If you are happy with using the default settings for the worker, you can actually skip the rest and finish the Network configurator here.
Status – The Status panel in the bottom of the window informs you about the current state on the worker, you can start it manually or set it to be restarted automatically when you finish the Network Configuration. If you are editing the settings of a worker that is already running, this will let you know when a restart is necessary
Worker Settings
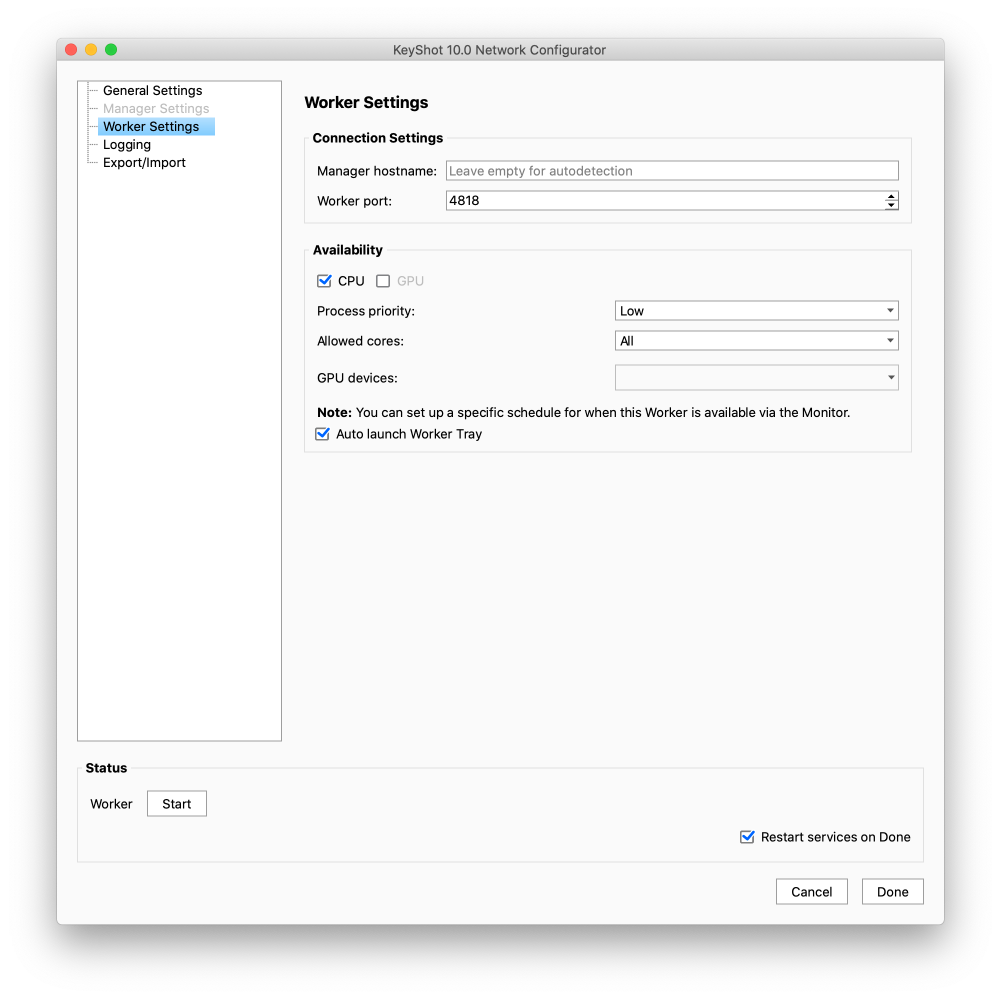
Connection Settings – Here you set up how the worker connects to the manager. With the default settings the worker will auto-connect to an manager on the same network.
- Manager Hostname – Specify which manager the worker should connect to.
- Worker Port – Set the port for the worker-manager connection. This should match the port set in the configuration of the manager – the default worker port in KeyShot 10 is 4818.
Availabilty – If you are using the Computer for other purposes besides Network Rendering you may want to limit the availability.
- CPU/GPU – Here you can select what type jobs the worker should be available for. The Worker can be one or both, . The GPU option will be disabled if the GPU does not meet requirements – see below.
- Process Priority – This will set the priority of the worker service in the computer, this is relevant if you are also running other applications on the computer. In which case a low priority will let the other applications use what they need of the available CPU resources first.
- Allowed Cores – If you have enabled use of the CPU for Network Rendering, you can set the default number of cores that are made available for Network Rendering. If you need to limit it temporarily, you can do it via the Worker Tray.
- GPU Devices – If you have enabled use of the GPU for Network Rendering, and you have multiple GPUs you can select which are made available for Network Rendering. If you need to limit it temporarily, you can do it via the Worker Tray.
- Auto Launch (not available for Linux Workers) – By default, all computers serving as Network Rendering workers will have the Worker Tray running. You can find it in the Task menu on Windows and the menu bar on Mac. In cases where you do not want the users to be able to easily limit/pause the cores you can disabled this.
GPU Requirements
GPU raytracing in KeyShot supports NVIDIA GPUs built on Maxwell microarchitecture and supports CUDA Compute Capability 5.0 or later found in the Quadro M6000 or GTX 980 and above.
We recommend:
- Graphics cards on the NVIDIA RTX platform with a minimum of 8 GB memory.
- Driver Version: For both KeyShot GPU on both Quadro and GeForce we recommend version 441.66.
Logging
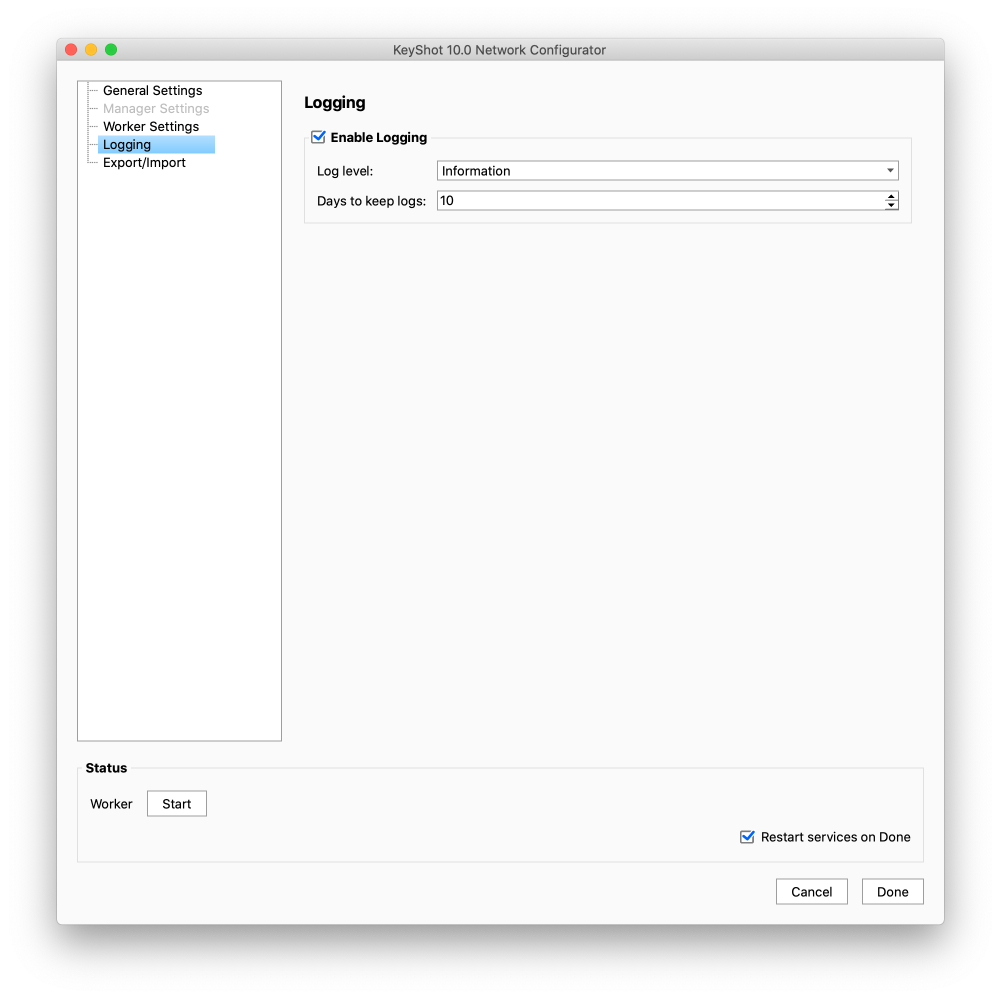
The log files keep track of Network Rendering state, information, and potential errors. If you enable logging on your worker you can select which incidents you want logged and how long to keep the logs. The Logs will be stored in the Resources folder (as set in the general settings). And they can be viewed in the Monitor.
To enable logging, click on Logging in the KeyShot Network Configurator and check the Enable logging option.
- Log Level – Choose at what level to record logs from: (Choosing a higher log level will record all other log levels below it.)
- Trace – shows all types of log messages.
- Information – no trace but shows warnings, errors, and fatals.
- Warning – no trace and information, but shows warnings, errors, and fatals.
- Critical – no trace, information, and warnings, but shows errors and fatals.
- Fatal – no trace, information, warnings, and errors, but shows fatals.
- Days to keep logs – Set a cutoff time for saved logs. Any logs that pass the set time frame will be deleted.
Export/import
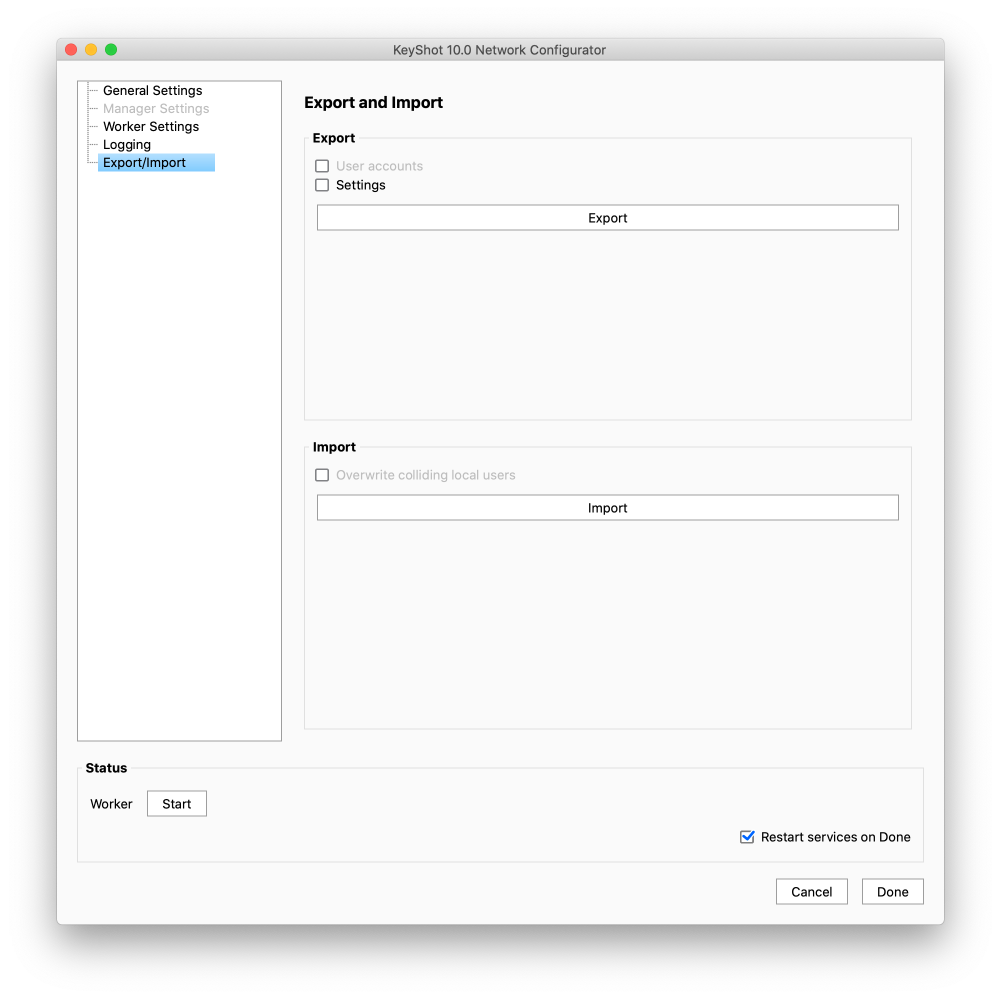
If you need to move your Network Rendering installation or simply want to reuse your current settings when upgrading, you can export User Accounts and/or Settings and import them on the new computer.
- Export – The export will include the network configurator settings.
- Import – Press import and select the .zip file. Notice that the location of the Resources folder will not be applied from the imported settings. And no user settings will er imported.
Note
The export will include the settings currently running on the worker. If you have made changes to the Network Configurator Settings you need to restart the configurator before exporting.
