On this page
If you want to increase the protection of your creative assets, you may want to encrypt the Network rendering communication. This can be done via TLS, see how in the Manager Setup.
There are three ways to get a TLS certificate: buy one via a certificate authority, get a free one via Let’s Encrypt, or create a self-signed certificate.
Buy certificate
There are many places to buy. Here are a few:
Free certificate via Let’s Encrypt
Let’s Encrypt is a certificate authority that creates free certificates that a just as secure as the ones you can buy.
The easiest way to get started is by following the instructions for their Certbot.
Create self-signed certificate
It is required to have OpenSSL installed.
Open a terminal and write the following to create private key file “key.pem” and certificate file “cert.pem” (both in the X.509 format):
% openssl req -newkey rsa:4096 -nodes -x509 -keyout key.pem -out cert.pem
Generating a 4096 bit RSA private key
..............++
...................................++
writing new private key to 'key.pem'
-----
You are about to be asked to enter information that will be incorporated
into your certificate request.
What you are about to enter is what is called a Distinguished Name or a DN.
There are quite a few fields but you can leave some blank
For some fields there will be a default value,
If you enter '.', the field will be left blank.
-----
Country Name (2 letter code) []:.
State or Province Name (full name) []:.
Locality Name (eg, city) []:.
Organization Name (eg, company) []:.
Organizational Unit Name (eg, section) []:.
Common Name (eg, fully qualified host name) []:127.0.0.1
Email Address []:.
Note that the value of the fields is not important except for the “Common Name”, which must be the IP or domain name used by the Monitors to connect.
Put the real IP in place of “127.0.0.1”.
Trust Certificate
If you get the following error, or similar, when you try to connect to the Manager, you have to state that you trust the certificate:
Error: Connection error: The root CA certificate is not trusted for this purpose
macOS
- Double-click the certificate file and add it to the Login Keychain.
- Click My Certificates in the left pane and find the item with the domain name or IP you input above.
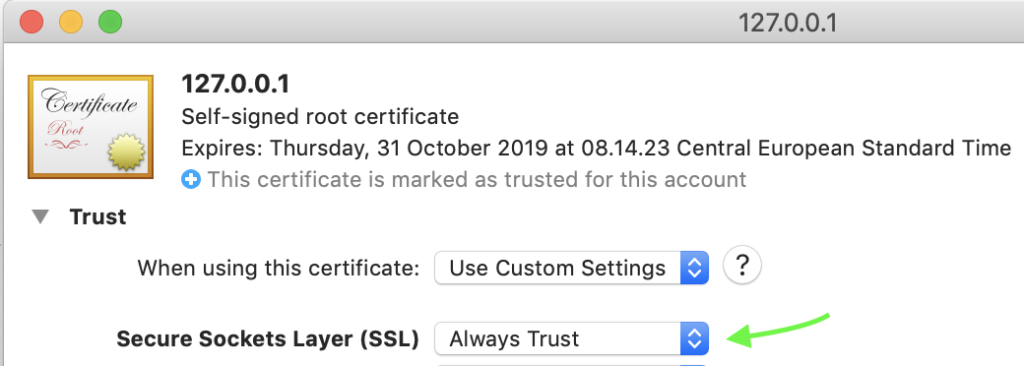
- Double-click that item and set it to Always Trust for Secure Sockets Layer (SSL).

Windows
- Launch MMC (mmc.exe).
- Choose File > Add/Remove Snap-ins.
- Choose Certificates, then choose Add.
- Choose My user account.
- Choose Add again and this time select Computer Account.
- Move the new certificate from the Certificates-Current User > Trusted Root Certification Authorities into Certificates (Local Computer) > Trusted Root Certification Authorities.