Once the client setup is complete and KeyShot Network Monitor is able to connect to the manager, you will be able to send your render jobs to the network. In the instructions below we assume that KeyShot is installed on your client computer.
How to send a job to the network
1. Open your scene in KeyShot.
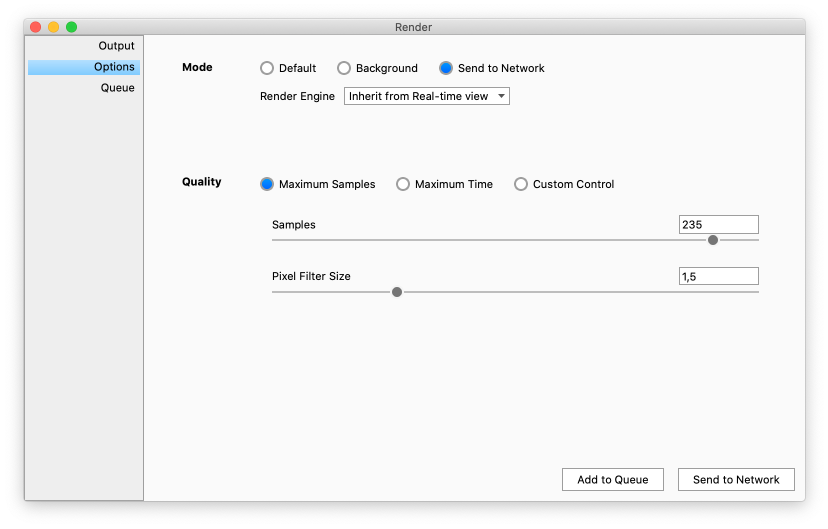
2. Open the Render dialog – It can be launched from the toolbar ![]() , via the Main menu > Render > Render or the hotkey Ctrl+P (Windows) or Cmd+P (Mac).
, via the Main menu > Render > Render or the hotkey Ctrl+P (Windows) or Cmd+P (Mac).

3. In the Options section select Send to Network.
4. Select Render Engine – You can submit jobs to Network Rendering in either CPU or GPU mode. If your computer is capable of rendering both the default choice will be Inherit from Real-time View. Note that some materials/textures are not supported in GPU mode – learn more.
5. Select the the rest of your render settings (visit the KeyShot Manual for more details) and confirm by clicking the Send to Network button. If there are no workers, using the same Render Engine, connected to the manager you will get a warning letting you know, so you can choose to switch mode or make sure appropriate Workers are made available to the Manager.
KeyShot will sync with KeyShot Network Monitor. Your job will be transferred to the manager computer and it will be added to the network queue. Anyone successfully connected to KeyShot Network Monitor will be able to see the list of jobs in the queue.
Tip
You do not need to be connected to the network while the job is being rendered. The images will be stored on the manager. Next time you connect to the manager, with the same user and computer, your finished jobs will automatically be downloaded to the given location. If you log into the monitor on another computer you can manually download your jobs. Learn more.